Friday, January 28, 2011

Clean-Up Time

Fuzz and I don't typically make New Years' resolutions, per se, but since 2010 has brought so many changes to both of our lives, we've decided to stay on trend and continue making more changes  -- positive ones.  In the past few months, I have acquired a trash bag filled with undesireable objects for which I have no use -- a bunch of worn-out clothes, CDs of lame music, a coffee maker that was sitting inside a dirty mold-filled house -- and I've been meaning to get rid of these things for some time now.  I've also been in the process of purging other areas in the house to prepare for a major transition, so it seemed like a great idea to resolve to get rid of our extra shit.

Rather than do a full-on insane sweep of the house, I opted for an easier idea: We'll get rid of a few boxes each month, either until the end of the year or until our house is clean, whatever comes first.  Moving a heap of boxes is a hassle, though.  We've got a longstanding relationship with a number of non-profit organizations to whom we like to give extra money and items whenever we can.  Because our favorite donation organization, the Massachusetts Vietnam Veterans of America, doesn't do door-to-door pickup in our "new" local area, we opted for our other favorite charity, the Big Brother & Big Sister Foundation.  It turned out to be a fabulously successful undertaking... all we needed to do was fill out the form online, have our boxes on the porch for them on the day of the pickup, and Bob's your uncle -- the stuff's out of our lives, and ready to go into the lives of someone who wants them.  Best of all, it helps a wonderful organization to do great things!  Since the January pickup went over so well, I'm already thinking of what I want to donate next month.  I may just decide to tackle the ever-so-nasty Bedroom Closet O' Doom!

Here are a few tips to help you get started donating...

1.  The general rule of thumb is that if you haven't used an item within the past year, and you're not sure you'll be using it within the next year, get rid of it!

2.  Start small.  There's no need to purge every square inch of your living space right away; do it in small, manageable steps.  For example, choose a room -- or part of a room, such as getting all the drawers in one dresser -- and get that done first before moving onto another section of your space.

3.  As FlyLady says, "Never take out more than you can put back in one hour."  I know it's exciting to get things purged, but take your time and do it right.

4.  Schedule your pick-up or drop-off day well in advance so that you can work on the mess in small, manageable bits.  Even if your house looks like an episode of Hoarders exploded all over it, an emergency cleaning session is just gonna stress you out.  Take it slow and make the process as easy and stress-free as possible.  You did not accumulate the clutter in the space of one day, so you need not feel pressured to get it immaculate in one day, either.

5.  Don't let guilt or regrets weigh you down.  Just because you got something for free and/or got a good deal on it (or, worse yet, spent WAY too much on it) doesn't make you obligated to keep it.  Likewise with presents that just aren't "you."  If you don't love it, let it go -- maybe there's someone out there who needs and wants it.  Give those things a good home where they'll be appreciated and loved.

6.  Donate and recycle as much as you can.  It's good for the environment, the economy, and the soul. 

7.  Don't feel the need to put it off because you "haven't gotten it all done yet."  Do what you can, you can always schedule another pick-up, or find local thrift shops and make dropping things off a regular habit!


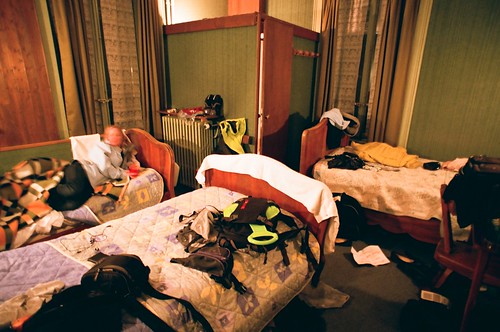
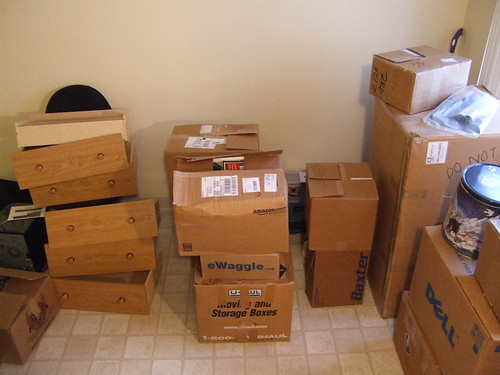
...And, in the interest of recycling and reusing, I have found these lovely pics on Flickr.  Thanks to the talented ed.ward for his awesome "messy room" photo, and the whimsical joebeone for the "moving boxes" pic!  I'm thrilled to give them credit in accordance with Creative Commons.  I do try to take my own pics when I can remember to do so, but I appreciate the sharing spirit of my fellow Flickr users.  Thanks!

Tuesday, January 25, 2011

It's Pumpkininny!

I roasted my final Fall '10 pumpkin this week.  Actually, I had 2 left, but one of them was totally rotten in the middle.  It was majorly nasty and oozy and black -- I should've thought to take a picture of it! One thing I *wanted* to do was save some of the orange hopefully-non-botulism-infested seeds to toast in the oven, as many frugalistas might try to salvage something that seems unsalvagable to people with a higher degree of sanity, but Fuzzband refused to allow any part of the offending item to remain in the house.  Amid my cries of "it's still good, it's still good!" he unceremoniously dumped the black mess into the trashcan and glowered whenever I dared approach!

Anyway, I was pleasantly surprised to see that after over 2 months, the other pumpkin that I got at the end of October was still fresh and in great eating condition (it was beginning to get just a teensy bit dry and stringy on the inside, but even my spouse could see that it was, indeed, "still good" for realz).  I roasted it to perfection, soft and sweet and slightly charred around the edges.  To celebrate, I decided *not* to bake a pumpkin pie, but instead of half-assedly throw together a tribute dessert that was much easier, lighter, and still evocative of my prime pumpkin days -- pumpkin pudding -- just one bite will have you dancin' around like Josh Fenderman!


PUMPKIN PUDDING

INGREDIENTS:
1 "small" package of instant pudding mix (vanilla will do nicely)
1 1/2 cups of milk
1 cup of cooked pumpkin, squash, or other orange-hued gourd, fresh, frozen or canned
1/2 to 1 teaspoon of cinnamon
2-3 pinches of nutmeg
1-2 pinches of cloves

Empty the pumpkin into a large bowl (and puree the living snot out of it with a hand mixer if you aren't using canned pumpkin). Add the milk slowly and continue mixing until about half the milk has been added.  Add pudding and spices, continuing to stir.  Then, slowly add the rest of the milk.

VARIATIONS AND NOTES (for those who are curious):  You could substitute butterscotch pudding for the vanilla, though I haven't tried that yet -- I'll also bet you can get awesome results subbing your favorite vegan mix and adding the pumpkin & spices to the final product.  Usually I make this with sugar free pudding mix and 1% milk; the "lighter" milks will make this come out a bit on the thin side, but it's still a very good substitute for pumpkin pie if you're feeling lazy. :)  I made a full-sugar version for a friend and poured it into a ready-made graham cracker crust... it made a pretty pie, though it was a bit softer than I'd've liked.  The lighter version with sugar-free pudding and 1% was served in a bowl without pie crust, and tasted pretty darn good by itself.  WARNING:  Don't use sweet potato in this; when it's whipped, it makes the pudding gluey and weirdly dense.  (Unless you like that sort of thing, of course.)

Sunday, January 2, 2011

Creative Commons Attribution

Well, it's a new year.  With 2011 comes an important decision. ;)  Actually I just thought to add some licensing information to my stuff.  I'd suggest this for anyone who blogs or creates things, and not just online either.

(Image courtesy of Flickr's "jorgeandresem")
You can visit CreativeCommons.org for more information on the Creative Commons licensing information.  The Creative Commons website is an extremely valuable resource for any creative person who needs help figuring out which licensing best fits each project.  The site explains the difference between each license in a way that's detailed, yet easy to understand.  If you get stuck, try their awesome licensing wizard to help determine what kind of license you need, as well as  how to present it on your website.


Creative Commons License


Protected by Copyscape Online Infringement CheckerCopyscape.com is also a great resource for people who want a quick-and-dirty "don't steal my shit" badge for their intellectual properties, to warn others against plagiarism.  Users can add an HTML notice to their content, as well as use Copyscape's service to scan the internet in order to find content which is being used without permission.


Remember to protect your content!  Also, if you need to reproduce someone else's work, be sure to ask permission or follow the direction of their licensing information.  A little respect for one another's original content will help our users get a lot more out of these resources.

Friday, October 22, 2010

More Halloween Fun

Here's an article I wrote some time ago... and yes, I've found the candle basket pics!
~~~
Halloween is taken very seriously here. To most people, this fun holiday might be about candy, costumes, and parties, but for me it's much more. The entire fall season is special, as are many of its aspects: The harvest, the exciting weather changes, beautiful displays of foliage, cold-weather treats, crisp cold air, costume excitement, edible seasonal treats, fun fall crafts, apple picking, pumpkin carving, cider brewing, leisurely strolls in an autumn-frosted cemetery. So many wonderful joys about throughout the season. The first day of fall always heralds great excitement for me, and with it comes my annual vow not to waste a single day. This year, so far, I haven't!

One of the ideas I had this year was to buy one pumpkin each week. (So far I'm on my third pumpkin.) Last week's became a whimsical yet simple emoticon-themed jack o' lantern (emoti-lantern?) It turned out cute, but it was really easy to do. I am NOT a very skillled jack o' lantern artist, so simple designs are usually my safest bet. This year, though, I'm going to "graduate" to more intricate designs as fall wears on. I'd highly recommend trying a jack o' lantern with your favorite emoticon if you're artistically-challenged like me!


My second pumpkin (this week's) was my version of a candle-lantern -- kind of a pumpkin candle basket. It's simply a hollowed-out pumpkin which has had a larg hole cut out of both sides.  The top was left intact so that I could easily pick it up and move it wherever I liked. Inside the pumpkin shell, I put in a large black candle and surrounded it with tealights. It's another easy project that even the least artistically skilled among us can do... and, to me at least, the smell of lightly scorching pumpkin is a festive one indeed. :)


Of course, one of the fringe benefits of pumpkin carving is the yummy bounty of seeds! I got a great recipe from HalloweenKitchen.Com for "Sweet Spicy Pumpkin Seeds." I've changed it just a little for my tastes...

INGREDIENTS:
seeds from 1 medium-sized pumpkin
2 teaspoons olive oil
3-4 drops tabasco sauce (just a hint of heat; you don't need a lot!)
4 tablespoons sugar
1/2 teaspoon salt
1/4 teaspoon ground cumin
1/4 teaspoon cinnamon
1/4 teaspoon ginger
1/4 teaspoon black pepper

Preheat oven to 250 degrees. De-gut the seeds, but don't wash them. Add olive oil and salt to the seeds; stir well. Then add all additional seasonings, and blend as thoroughly as possible. Place on a lightly sprayed cookie sheet and roast for about 20 minutes. (Check the seeds every 5-10 minutes and stir to ensure an even browning.) These will be VERY sticky, and they'll probably stick together a lot, but just do the best you can. After they're roasted to your liking, let them cool and, if you like, use your hands to break apart any seeds that have stuck together.

These seeds are SO good! I've done spiced pumpkin seeds a multitude of ways, but I really loved Wanda's recipe. My favorite part is the smoky cumin combined with the sweetness of the toasted sugar. It works so beautifully with the traditional fall seasonings here.

My next pumpkin-processing adventure is going to include the 30-pounder that I got yesterday! I'll keep everyone posted!

Thursday, October 21, 2010

The Ghosts of Halloweens Past

Halloween tends to be one of my craftiest times of year!  But this year, well, a lot of shit happened, so I didn't get to be as domestically productive as I'd have liked.  Instead, I decided to reflect on some of the fun things I've done on previous Halloweens.  

One of the things I enjoy the most during this time of year is pumpkincrafting.  I love carving jack o' lanters, cooking pumpkins, making cakes, pies, and cookies out of yummy fall gourds -- as well as tasty savory dishes.  And let's not forget pumpkin seeds!  But the first matter of business is about carving the pumpkin.


Yeah, I know, this isn't a jack o' lantern in the traditional sense... it's a cucumber that I cut in half, carved an evil little face on, and backed up with a tea light.  However, I consider it one of the best jack o' lanterns I've ever done because it's so adorably sinister! ;)


Here's one of the more intricate jack o' lanterns that I've managed to do fairly well.  I highly recommend the carving kits and books by Pumpkin Masters -- they'll really help you master the pumpkin.  Even novices can churn out beautiful finished products in a relatively short time!  This spooky mask pattern was daunting to look at, but it actually turned out to be pretty easy.  Part of the eyebrow on the right side broke off during the carving, but I used a toothpick to put it back into place and no one was the wiser.


Another pattern by Pumpkin Masters.  This vampire theme was by far the easiest one in the book that year (which I believe was circa 2007), but it looked very dramatic with the lights dimmed.  The big open space in the pattern also made it really easy to add and position multiple candles.


Here's a winking emoticon from 2006 -- it's my own simple freehand design.


I'm still searching for a better shot of this "candle basket" that I made out of a pumpkin.  It was easy as hell; just cut out two sides of the pumpkin, scrap well, and fill with some candles.  It looked pretty and lasted longer than I thought it would.  I've heard that you're not supposed to consume old jack o' lanterns after candles have been burning inside them, but with this candle basket, I was able to cut enough pumpkin to cook for dinner that night.  So this one is both pretty and practical!


I also loooooove Halloween candy; I look forward to it all year!  These spooky marshmallow peeps imparted a really festive touch to an ordinary cup of hot chocolate.  Who can resist having an excuse to add extra marshmallows? ;)


Cemetery photography is a serious interest of mine.  As most of the images in this entry, this 2007 picture was taken with a crappy cell phone camera.  I wanted to share it because of thost gorgeous leaves... ahh, you can almost smell that crisp fall air!  


Fuzzband and I went to the 3-D theatre re-release of The Nightmare Before Christmas one year -- I think it was 2006 -- and we had a blast.  I wish they would put it in theatres every year!  The theatre people painted a really cool "movie poster" in the theatre window.  This was the best picture I got on my old cell phone.


And of course, what Halloween would be complete without a mysterious black-furred familiar?  Here's mine... Seamus the bunny, getting his routine face cleaning!  (He had weepy eyes that needed our attention from time to time.)  He and his bunny wife, Aggie, lived with us from 2003 until their passing in 2009 (Aggie died at the end of June, and Seamus departed a month later).  Vets are estimated his age to be about 10 or 11 at the time; he had a multitude of illnesses, but he was a sweet and wonderful soul who brought so much love and joy into all our lives.  We adopted him and Aggie from New England's very own House Rabbit Network in 2003; he used to belong to a homeless woman.  Seamus was a noseless bunny with broken toes and bites in his ear -- but he was such a cool, mellow dude!  Seamus and Aggie are in my heart, and I still think of them and miss them every day.  This picture was taken in 2006; I'm sure I'll post better bunny pictures sometime though. :)


Thursday, September 30, 2010

Holy Shit! More on a Stick!

 
Turkey is another yummy thing to cook on skewers.  By marinating strips of meat in a spicy marinade, you can turn mild-tasting turkey into a delicious flavor-packed meal that's healthy, convenient, and impressive.  These are delicious right off the grill, or even chilled the next day.  


TURKEY CHOOCHACHEECHACHOO FOR A CROWD OF SCREAMING FANS!

INGREDIENTS:
1 entire turkey breast
1 package of McCormick "Zesty Herb" marinade mix
2 teaspoons of curry powder
1 teaspoon of turmeric
1/2 cup white vinegar
1 teaspoon of dried garlic OR 4 cloves of fresh chopped garlic
Hot sauce to taste (I insist you use Frank's; a goodly amount, but not so much that people think they are eating buffalo choochacheechachoo [though now that I think about it, that sounds pretty good too]!)


EQUIPMENT:
skewers
knife
1 gallon plastic bag

First, take the skin off of your turkey breast.  Then cut all of the delicious boob meat off of your turkey, trying to keep each half as intact as you can.   (You can save the bones and all the meat sticking onto those hard-to-reach places for soup stock; just toss it in the crockpot with a bit of veggies and your choice of spices, add some water, and... Bob's your uncle!  Yummy stock/broth in about 3-4 hours!)

Slice the turkey breast meat into strips and place into the plastic bag.  Add all the other ingredients and marinate 8 hours or overnight.  When it's time to cook the turkey, place the strips onto sticks and grill for about 20 minutes on a low heat, or until the turkey is done.  Sometimes I finish these off with a light glaze of apricot preserves and curry powder so they'll look pretty on a plate, but if that's not your thing, this is especially tasty with Awesome Sauce.


Thursday, September 16, 2010

Shit on a Stick Redux

In keeping with the spirit of my "Summer of Food on Sticks," I have decided to write a bonus article about some of the other things I've been putting on sticks lately.  It's not all about beef heart choochacheechachoo in this house. ;)

One of the healthiest, easiest, and tastiest "stuff on sticks" that I enjoy is frozen grape choochacheechachoo.  These are super easy, and so convenient when you need a snack. 

FROZEN GRAPE CHOOCHACHEECHACHOO

INGREDIENTS:
grapes (best if you have 2 or more colors)

EQUIPMENT:
skewers

All you need to do is wash your grapes well, and then place 9 grapes on each skewer.  If you have many different types of grapes, you can do some fun patterns, too!  Pop them into the freezer and keep them there overnight.  These look beautiful arranged in bunches on a platter or tray, but are also a wonderfully convenient fruit snack when you're craving something quick, sweet, and satisfying.  Kids love them too.

Friday, September 10, 2010

Challah Back

Although carbs are awesome, I've never been big on just plain commercial grocery-store bread.  However, fresh yummy bread that's made from scratch is a wondrous thing.  I lack the patience to make it very often; once every few years is enough.  I hate having to wait all day for the darn thing to rise, then I worry about the cooking time in the oven... and then, of course is the thrill of cleaning up all the floury mess.  Yeah... just not my thing.

I have long suspected that I might just become awesome at baking bread if I'd just try it a little more often.  Rosh Hashanah seemed like the perfect time to make my all-time favorite type of bread: challah!  (Bagels [if they count] are a very close second, and croissants are third on the list.)  Challah is quite the endeavor, but the results are soooooo worth it!

Usually my way of cooking a new recipe is to scan it for things I want to change before actually attempting it.  This time, however, I Googled for a recipe that seemed to make the most sense to me, and -- miraculousy -- decided to follow it to the letter.  My pick was Maggie Glezer's honey-scented challah recipe, which looked and sounded absolutely decadent with its added smattering of honey to the dough.  The entire process, while arduous to me, was still such fun and yielded two little loaves of the most perfect challah one could ever desire.  And although it wasn't what I'd call easy, the recipe was straightforward enough that even a bread n00b like me wasn't able to screw it up!

Apparently, Maggie is somewhat notorious for her bread recipes 'round the internet, as I've seen several  other bakers reproducing the offerings from her book A Blessing of Bread: Recipes and Rituals, Memories and Mitzvahs as well.  Eli at The Fresh Loaf took some fantastic pictures of the fruits of his labor, and Sarah Kagan at Epicurious got some great tips from Maggie on how to ensure the best possible results.

I don't have permission to reprint the recipe here, but she has it over at Epicurious for those who are interested in trying it (and I highly recommend that you give it a whirl!).  I can, however, show you some of the pretty pictures that I took while Fuzzband and I worked on our challah.


We made our yeast slurry, then added the rest of our wet ingredients....


...mixed in the other dry ingredients...


...and turned it into a ball!


We covered the ball with some plastic grocery bags (a great way to reuse), and let it sit on the table for a couple of hours.  It doubled in size and started to smell awesome!


Then it was time to assemble my loaves.  I divided the dough ball into halves, and made 3 long skinny strands out of each half.  I braided them together...


... and set them up on my trusty old cookie sheet.  Then we covered them with our plastic bags, and left them on the table to proof.


And proof they did!  When we'd unwrapped them, they surprised us by being almost 3 times bigger than they were before!  Look how succulent and fat and yummy they are!  Fuzz brushed the outside with egg while I snapped an "action shot," then into the oven our challahs went!


Here's the stunning finished product, all shiny and gorgeous.  It smelled and tasted so amazing that we've decided to definitely make it again -- maybe next year, but perhaps even sooner.


Sunday, September 5, 2010

Glove Love

I needed some gloves to protect the backs of my hands from the sun during a long car trip, so I came up with these super-duper easy gloves!  They're so easy that even the most elementary knitter (like me!) can make them.

The yarn I chose was Bernat Soft Bouclé acryllic/poly blend and number 10 needles.  It had a cool fuzzy texture that was a bit slow to work with at times, but overall it worked out fine.  I knitted a rectangle that fit my hand (it was 35 rows in length), then then sewed it up one side, leaving a small hole for my thumb near the top.  Then I braided some extra yarn into small strips, and sewed the strips between my fingers to make secure little sections for each finger.

It worked great, and I didn't get any sunburn on the way home!  Best of all, the yarn cost about $6 and I still have probably 80% of it, so this was also a very cost-effective project as well!  Next time I'll see if I can learn how to make fingers.
Related Posts Plugin for WordPress, Blogger...