Thursday, September 30, 2010

Holy Shit! More on a Stick!

 
Turkey is another yummy thing to cook on skewers.  By marinating strips of meat in a spicy marinade, you can turn mild-tasting turkey into a delicious flavor-packed meal that's healthy, convenient, and impressive.  These are delicious right off the grill, or even chilled the next day.  


TURKEY CHOOCHACHEECHACHOO FOR A CROWD OF SCREAMING FANS!

INGREDIENTS:
1 entire turkey breast
1 package of McCormick "Zesty Herb" marinade mix
2 teaspoons of curry powder
1 teaspoon of turmeric
1/2 cup white vinegar
1 teaspoon of dried garlic OR 4 cloves of fresh chopped garlic
Hot sauce to taste (I insist you use Frank's; a goodly amount, but not so much that people think they are eating buffalo choochacheechachoo [though now that I think about it, that sounds pretty good too]!)


EQUIPMENT:
skewers
knife
1 gallon plastic bag

First, take the skin off of your turkey breast.  Then cut all of the delicious boob meat off of your turkey, trying to keep each half as intact as you can.   (You can save the bones and all the meat sticking onto those hard-to-reach places for soup stock; just toss it in the crockpot with a bit of veggies and your choice of spices, add some water, and... Bob's your uncle!  Yummy stock/broth in about 3-4 hours!)

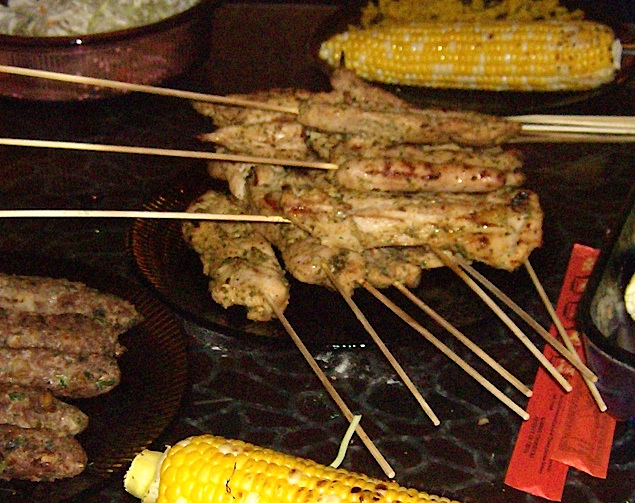
Slice the turkey breast meat into strips and place into the plastic bag.  Add all the other ingredients and marinate 8 hours or overnight.  When it's time to cook the turkey, place the strips onto sticks and grill for about 20 minutes on a low heat, or until the turkey is done.  Sometimes I finish these off with a light glaze of apricot preserves and curry powder so they'll look pretty on a plate, but if that's not your thing, this is especially tasty with Awesome Sauce.


Thursday, September 16, 2010

Shit on a Stick Redux

In keeping with the spirit of my "Summer of Food on Sticks," I have decided to write a bonus article about some of the other things I've been putting on sticks lately.  It's not all about beef heart choochacheechachoo in this house. ;)

One of the healthiest, easiest, and tastiest "stuff on sticks" that I enjoy is frozen grape choochacheechachoo.  These are super easy, and so convenient when you need a snack. 

FROZEN GRAPE CHOOCHACHEECHACHOO

INGREDIENTS:
grapes (best if you have 2 or more colors)

EQUIPMENT:
skewers

All you need to do is wash your grapes well, and then place 9 grapes on each skewer.  If you have many different types of grapes, you can do some fun patterns, too!  Pop them into the freezer and keep them there overnight.  These look beautiful arranged in bunches on a platter or tray, but are also a wonderfully convenient fruit snack when you're craving something quick, sweet, and satisfying.  Kids love them too.

Friday, September 10, 2010

Challah Back

Although carbs are awesome, I've never been big on just plain commercial grocery-store bread.  However, fresh yummy bread that's made from scratch is a wondrous thing.  I lack the patience to make it very often; once every few years is enough.  I hate having to wait all day for the darn thing to rise, then I worry about the cooking time in the oven... and then, of course is the thrill of cleaning up all the floury mess.  Yeah... just not my thing.

I have long suspected that I might just become awesome at baking bread if I'd just try it a little more often.  Rosh Hashanah seemed like the perfect time to make my all-time favorite type of bread: challah!  (Bagels [if they count] are a very close second, and croissants are third on the list.)  Challah is quite the endeavor, but the results are soooooo worth it!

Usually my way of cooking a new recipe is to scan it for things I want to change before actually attempting it.  This time, however, I Googled for a recipe that seemed to make the most sense to me, and -- miraculousy -- decided to follow it to the letter.  My pick was Maggie Glezer's honey-scented challah recipe, which looked and sounded absolutely decadent with its added smattering of honey to the dough.  The entire process, while arduous to me, was still such fun and yielded two little loaves of the most perfect challah one could ever desire.  And although it wasn't what I'd call easy, the recipe was straightforward enough that even a bread n00b like me wasn't able to screw it up!

Apparently, Maggie is somewhat notorious for her bread recipes 'round the internet, as I've seen several  other bakers reproducing the offerings from her book A Blessing of Bread: Recipes and Rituals, Memories and Mitzvahs as well.  Eli at The Fresh Loaf took some fantastic pictures of the fruits of his labor, and Sarah Kagan at Epicurious got some great tips from Maggie on how to ensure the best possible results.

I don't have permission to reprint the recipe here, but she has it over at Epicurious for those who are interested in trying it (and I highly recommend that you give it a whirl!).  I can, however, show you some of the pretty pictures that I took while Fuzzband and I worked on our challah.


We made our yeast slurry, then added the rest of our wet ingredients....


...mixed in the other dry ingredients...


...and turned it into a ball!


We covered the ball with some plastic grocery bags (a great way to reuse), and let it sit on the table for a couple of hours.  It doubled in size and started to smell awesome!


Then it was time to assemble my loaves.  I divided the dough ball into halves, and made 3 long skinny strands out of each half.  I braided them together...


... and set them up on my trusty old cookie sheet.  Then we covered them with our plastic bags, and left them on the table to proof.


And proof they did!  When we'd unwrapped them, they surprised us by being almost 3 times bigger than they were before!  Look how succulent and fat and yummy they are!  Fuzz brushed the outside with egg while I snapped an "action shot," then into the oven our challahs went!


Here's the stunning finished product, all shiny and gorgeous.  It smelled and tasted so amazing that we've decided to definitely make it again -- maybe next year, but perhaps even sooner.


Sunday, September 5, 2010

Glove Love

I needed some gloves to protect the backs of my hands from the sun during a long car trip, so I came up with these super-duper easy gloves!  They're so easy that even the most elementary knitter (like me!) can make them.

The yarn I chose was Bernat Soft BouclĂ© acryllic/poly blend and number 10 needles.  It had a cool fuzzy texture that was a bit slow to work with at times, but overall it worked out fine.  I knitted a rectangle that fit my hand (it was 35 rows in length), then then sewed it up one side, leaving a small hole for my thumb near the top.  Then I braided some extra yarn into small strips, and sewed the strips between my fingers to make secure little sections for each finger.

It worked great, and I didn't get any sunburn on the way home!  Best of all, the yarn cost about $6 and I still have probably 80% of it, so this was also a very cost-effective project as well!  Next time I'll see if I can learn how to make fingers.
Related Posts Plugin for WordPress, Blogger...