Showing posts with label green. Show all posts

Saturday, February 11, 2012

99 DIY Lifestyle Skills

Being a do-it-myself kinda gal, I have to say that this post at over at TLC intrigued me.  I went through the list, sort of halfway nodding my head, and then I realized that there are a lot of things on the list that I can work toward, either now or after I've relocated.  Feel free to check and see how you're doing.  I'd also love to hear more unlisted skills that those reading this deem to be valuable.

My personal grading scale: 0 - not doing this, or it doesn't apply to me, .5 - I know how to do this and have been working on doing better, 1 - this is a regular part of my life.

Essential Food Skills
1. Read and understand product labels 1
2. Bake bread 1
3. Make your own bread starter and keep it going .5 (I don't consume a lot of bread)
4. Make cheese, yogurt, and kefir from local milk .5 (I can do all but kefir)
5. Preserve food by canning 0 (scary!)
6. Preserve food by drying .5
7. Forage for local wild foods safely 0
8. Raise a couple of backyard chickens 0 (I wish I had the room!) 
9. Make your own tofu,tempeh, and soy milk .5
10. Eat locally and in season 1
11. Grind your own flour .5 (I've done it)
12. Grow your own produce 0
13.Grow your own herbs 1
16. Have a repertoire of vegetarian recipes you can use for various occasions 1
17. Fish or hunt responsibly if you eat meat 1 (I don't hunt, but I know the basics.)
18. Make homemade pastas and other pantry basics  .5
19. Cook a variety of foods well 1
20. Utilize a menu to minimize food waste 1
21. Throw a party without compromising your green values 1
23. Sharpen kitchen knives so they last 1
24. Make homemade granola bars, granola, waffles, and other breakfast items 1
25. Make baked goods from "scratch". 1
26. Understand terms like, "organic", "Fair Trade", "all natural", and "GMO" 1

Essential Household Skills 
27. Sew well enough to repair clothing 1
28. Sew well enough to make your own clothing and reusable shopping bags 1 (not all of my clothing is handmade, but several pieces are, as well as my storage.)
29. Sew fitted cloth diapers for your baby 1 (do bunny needs count?)
31. Know how to reupholster a chair .5 (I know how to, and have done it - just not WELL.) 
32. Make your ownlaundry soap 1
34. Make your own house cleaning supplies .5
35. Use diatomaceous earth, bay leaves, and other "eco-friendly" natural pest deterrents 1

Home Maintenance and Repair Skills 
36. Use non-electric appliances rather than electric 1
38. Program a thermostat .5
40. Use 0 VOC paint 1
43. Make simple appliance repairs such as replacing belts 0
44. Find what you need by bartering, or using CraigsList, eBay, and thrift stores 1
45. Repair a leaky toilet 0
46. Repair a leaky faucet 0
48. Check your home for energy leaks using incense, a candle, or a device that is created for that purpose 1
50. Insulate an attic with eco-friendly insulation 1

Gardening Skills 
52. Use compost to enrich your soil .5
53. Plan a garden for your climate .5
54. Understand xeriscaping 1 (kinda)
55. Plant a multi-seasonal vegetable garden 0 (no room! wahw!)
56. Build a simple cold frame for salad all year 0
59. Use a manual reel mower 0
60. Use companion planting methods to control pests 0
61.Build a bat house to encourage bats and decrease mosquitoes .5 (soooo want to do this!)
62. Use predator insects like Praying Mantis to control garden pests 0
63. Know what heirloom seeds are and why you should use them 1
64. How to plant open pollinated vegetables for best yields 1
65. How to save seeds from your own produce 1
66. Plant trees and bushes to cut your energy bills 0 
67. Use soaker hoses to conserve water 0
68. Sharpen and maintain tools 1

Health Skills 
69. Know how to use herbs and natural remedies to treat common illnesses 1
72. Use essential oils for health and cleaning 1

Transportation Skills 
75. Do simple maintenance on your car  0
76. Arrange or locate a carpool 0
77. Learn to use hypermiling techniques 0


Energy Skills 
80. Install a solar panel 0
81. Know where to find the most eco-friendly, green power source available to you 1
82. Connect home electronics to power strips for easy shut off 1

Conservation Skills 
85. Use email rather than conventional mail 1
86. Switch to a paperless office .75 (I am soooooo close!)
87. Locate the local library and use it rather than buying books, DVDs, and tapes 1
88. Adjust your settings on the computer to make it more energy efficient 1
89. Use skype and other technology to limit the need for travel to conferences 1
90. Learn to plan eco-friendly vacations, such as camping (and leave no trace) 
91. Replace a hobby with an environmentally friendly hobby 1
92. Locate and use recreational green spaces such as hiking trails, parks, and public gardens .5
93. Understand and be able to explain what cradle to cradle means 1
94. Understand and be able to explain what carbon emissions are 1
95. Understand and be able to calculate a carbon footprint as well as explain what it is 1
96. Know where to recycle technological items like computers, microwaves, televisions etc. 1
98. Know where reusable items can be substituted for disposables 1
99. Understand and be able to explain cap-and-trade 1


My final score = 68.25%
Hmmm, that's a "D."  To be fair, a lot of it is stuff I can't help (like keeping chickens or installing solar panels, as I'm not a homeowner).  But I should try harder on the stuff that I can change!  Still, that was pretty interesting.  I'll have to see how I can streamline things a bit.

Friday, August 5, 2011

Swiffer Stuffs

As most people who know me are well aware, I love to make things.  Cooking is one of my true passions for this very reason: It's quick, most endeavors are relatively inexpensive, and the end result can be used in practical, smart ways that don't end up in a lot of clutter.  You eat it, you poop it out, and Bob's your uncle -- creativity recycled!  

I don't like projects that take forever, or that clutter up the house.  As a serious fan of the Swiffer from when it first came out (and yes, I still have the 1999 Swiffer, which is more sturdy than my 2006 version), I've always considered the replacement covers something of a luxury... if I am dusting, I'm not above twisting them over so that the dust-free side can get its share of use as well. ;)  I've also used things like socks and washcloths for covers when wiping floors that need a bit of wet attention -- and for the most part, these have been successful undertakings.
But I've also wanted to try making a cover that was specifically designed JUST for the Swiffer.  And even though I'm capable of knitting only a simple garter stitch, knitting reusable Swiffer covers out of yarn is just about the easiest thing anyone can do.  Here's how! :)

1.  Choose your medium.  You can see from this picture that I used two different kinds of standard acryllic yarn -- the pretty lavender kind was the last of a soft skein of nicer stuff from JoAnn fabrics, and the burgundy was from a 99-cent store in NYC.  Just use whatever you have; after all, it's not a beauty contest if it's just going to be scrubbing the scum around your toilet.

2.  Knit!  Cast on about 33 rows.  (I used this number because it was my age when these pictures were taken... yeah, these sat around awhile!)  Knit a plain ol' garter stitch until you have a rectangle that pretty much covers your Swiffer.  Your mileage may vary, depending on how tightly you make your stitches and on what size needle you like (I used a size 10), but mine are generally somewhere within the neighborhood of 50 and 70 rows.  It is OK if you knit it to be just a tiny bit too small... keeps the cover on even better, in fact.

3.  Take your rectangle, and fold it into thirds.  The Swiffer will fit into the opening between the thirds.

 4.  Stitch the sides together.  Use anything you want -- more yarn, thread, whatever.  (I used a hideous baby-weight rainbow yarn that I have noooooo idea what other uses I can find for it!)  You could probably even glue or staple them, but that seems like a hell of a lot of trouble, and would likely require many goings-over.

5.  Put the business end of your Swiffer into the horizontal opening.  You can punch the cover down into those annoying little tabs if you want, but honestly I never do, and my Swiffer covers never go anywhere.

6.  If you're dusting, flip it over!  If you're washing something hard-core, flip it over! (Unless the dirty item in question is way too nasty to handle.)
7.  Mine are machine-washable (depends on the yarn you use) and durable.  See the lavender ones in this picture?  They were made about 2 years ago, and are just beginning to get old.

You can also use these without the Swiffer, but it's not quite as much fun.

Friday, January 28, 2011

Clean-Up Time

Fuzz and I don't typically make New Years' resolutions, per se, but since 2010 has brought so many changes to both of our lives, we've decided to stay on trend and continue making more changes  -- positive ones.  In the past few months, I have acquired a trash bag filled with undesireable objects for which I have no use -- a bunch of worn-out clothes, CDs of lame music, a coffee maker that was sitting inside a dirty mold-filled house -- and I've been meaning to get rid of these things for some time now.  I've also been in the process of purging other areas in the house to prepare for a major transition, so it seemed like a great idea to resolve to get rid of our extra shit.

Rather than do a full-on insane sweep of the house, I opted for an easier idea: We'll get rid of a few boxes each month, either until the end of the year or until our house is clean, whatever comes first.  Moving a heap of boxes is a hassle, though.  We've got a longstanding relationship with a number of non-profit organizations to whom we like to give extra money and items whenever we can.  Because our favorite donation organization, the Massachusetts Vietnam Veterans of America, doesn't do door-to-door pickup in our "new" local area, we opted for our other favorite charity, the Big Brother & Big Sister Foundation.  It turned out to be a fabulously successful undertaking... all we needed to do was fill out the form online, have our boxes on the porch for them on the day of the pickup, and Bob's your uncle -- the stuff's out of our lives, and ready to go into the lives of someone who wants them.  Best of all, it helps a wonderful organization to do great things!  Since the January pickup went over so well, I'm already thinking of what I want to donate next month.  I may just decide to tackle the ever-so-nasty Bedroom Closet O' Doom!

Here are a few tips to help you get started donating...

1.  The general rule of thumb is that if you haven't used an item within the past year, and you're not sure you'll be using it within the next year, get rid of it!

2.  Start small.  There's no need to purge every square inch of your living space right away; do it in small, manageable steps.  For example, choose a room -- or part of a room, such as getting all the drawers in one dresser -- and get that done first before moving onto another section of your space.

3.  As FlyLady says, "Never take out more than you can put back in one hour."  I know it's exciting to get things purged, but take your time and do it right.

4.  Schedule your pick-up or drop-off day well in advance so that you can work on the mess in small, manageable bits.  Even if your house looks like an episode of Hoarders exploded all over it, an emergency cleaning session is just gonna stress you out.  Take it slow and make the process as easy and stress-free as possible.  You did not accumulate the clutter in the space of one day, so you need not feel pressured to get it immaculate in one day, either.

5.  Don't let guilt or regrets weigh you down.  Just because you got something for free and/or got a good deal on it (or, worse yet, spent WAY too much on it) doesn't make you obligated to keep it.  Likewise with presents that just aren't "you."  If you don't love it, let it go -- maybe there's someone out there who needs and wants it.  Give those things a good home where they'll be appreciated and loved.

6.  Donate and recycle as much as you can.  It's good for the environment, the economy, and the soul. 

7.  Don't feel the need to put it off because you "haven't gotten it all done yet."  Do what you can, you can always schedule another pick-up, or find local thrift shops and make dropping things off a regular habit!


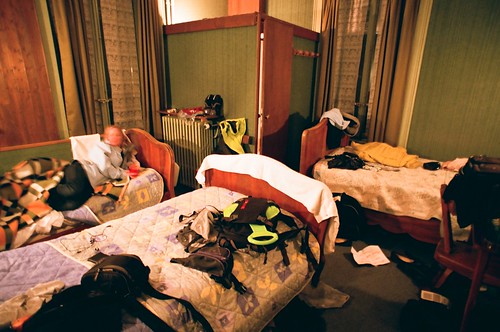
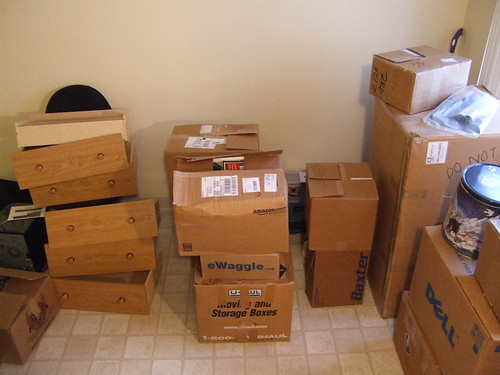
...And, in the interest of recycling and reusing, I have found these lovely pics on Flickr.  Thanks to the talented ed.ward for his awesome "messy room" photo, and the whimsical joebeone for the "moving boxes" pic!  I'm thrilled to give them credit in accordance with Creative Commons.  I do try to take my own pics when I can remember to do so, but I appreciate the sharing spirit of my fellow Flickr users.  Thanks!

Friday, July 30, 2010

Make Your Own Laundry Detergent

Trent over at The Simple Dollar wrote a really interesting article on how to make your own laundry detergent.  His formula was remarkably similar to my own "washing slime" that I used to use on my delicate hand-washables which I'd clean in the bathroom sink.  Like mine, his formula starts out with a bar of soap processed with water.  Mine added scented linen water to the mix, whereas his includes washing soda and Borax.  My mother used to keep a MASSIVE box of Borax in our basement laundry room.  I never had any idea what it was for, but I do now!  I guess people used to use it back in the day for removing stains, or adding it into laundry that was particularly dirty.  It can be harsh on clothes, but effective.  It also makes a great base for all sorts of natural cleaning agents.

Fuzzband used to find my washing slime to be rather gross, but when I explained the cost saving in Trent's formula, he was intrigued to find out if the DIY laundry soap could really clean as Trent claims, comparable to liquid Tide!  We decided that it'd be an interesting weekend project and set about gathering supplies.


Homemade Laundry Detergent Ingredients:
1 bar of your favorite soap
1 cup washing soda
1/2 cup borax
3 gallons of water (plus a little extra)

Equipment:  Big ol' pot (or smaller pot and bucket, big enough to hold about 3 gallons), knife or grater for demolishing soap, spoon for stirring, containers for storing the final product.


The first thing we did was to get our shit together.  We bought the Borax and the washing soda (there's plenty left over to do other projects).  I'd had a cake of unscented Dove in my kitchen ever since my mother-in-law included it with the late, great Aunt Pearl's hand-crocheted afghan to pretty up the musty in-storage smell.  The soap still smelled good, and I knew it'd be perfect for this project.  (The Sidekick is an optional ingredient!)


My husband started a couple cups of water boiling in our big ol' pot while I chopped up the bar of soap.  Originally, I wanted to shave it with a vegetable peeler, but after about 10 seconds of futile scraping, I gave up and hacked the darn thing to bits and pieces.


Into the pot our soap shavings went!  We boiled the whole thing, until it turned into...


... a big, foamy blob o' fun!  Then it was time to add the Borax and the washing soda.


Then Fuzzband poured in about three gallons of water.   We almost used Hawaiian Punch, but we got thirsty.  So yeah, in went the water.  Then we stirred the mix until it was thoroughly blended, covered it (to keep out the dust), and left it to "cure" until the following day.  (Trent's directions say to leave it for about 24 hours -- I think we left it for somewhere around 16 and it was just fine.)


You can tell it was a day later, 'cause our kitchen got a bit cleaner. ;)  The final product, Trent's website says, may be slimy or watery or thick or something completely different.  Ours was nearly perfect liquid detergent consistency -- it was only a slimy, but no big deal.  I broke it up with a wooden spoon before we poured it into our leftover detergent bottles.  (OK, actually I rolled up my sleeves and played in it for awhile first.  My hands were very dry afterward, so I wouldn't recommend using this formula on skin.  Keep it in the washing machine, people!)


The batch yielded enough detergent to fill up this many bottles!  We'll probably use a capful or two per load, so we don't need to worry about getting/making new detergent for months and months!


You might ask how the homemade detergent cleans.  To tell you the truth, I don't notice much difference between our DIY stuff and the usual laundry detergents that we use -- BUT, just to let you know, most of my clothes are black.  So I didn't try any white shirt/mustard tests. ;)    It smells vaguely like the unscented Dove bar that we used, so it gave our clothes a very subtly, yet comforting fragrance of my in-laws' house.  In the interest of keepin' it real, I tried my best to stick with Trent's recipe.  I don't think I'd change anything about the ingredients or instructions -- maybe next time I'll add a bit of essential oil if I try a different soap.  

This was a super fun project!  If you're on the fence about trying it, I'd say that you should go for it.  The basic ingredients will cost you less than $10, and you'll have them for a lot longer than that store-bought bottle of detergent.  Give it a shot!

Wednesday, August 12, 2009

Save Our Planet Earth


Yahoo! is going to be deleting Geocities this year... taking away some informative websites that have been around since the beginning of the internet as we know it. The Internet Archives at http://www.archive.org will be trying to get as many sites as possible until that fateful day, but many will be gone forever!

 The original URL is http://www.geocities.com/EnchantedForest/8319/savethearth.html. Our planet is in peril, so if you haven't started doing the baby steps below, you'd better get cracking! :)

We've got to Save Our Planet Earth!


Oh, No! Our earth is in trouble, and we've got to save it!Oh, No!: Bad Facts about our earth

  • If you throw away 2 aluminum cans, you waste more energy than1,000,000,000 (one billion) of the world's poorest people use a day.
  • Making a new can from scratch uses the uses the energy equal to half a can of gasoline.
  • About one third of what an average American throws out is packaging.
  • More than 1,000,000,000 (one billion) trees are used to make disposable diapers every year.
  • In one minute, 50 acres of rainforest are destroyed.
  • Some rain has a pH of 3 or 4. (which is pretty acidic, considering 7 is neutral, not acidic, and battery acid has a pH of 1). Some fish, such as lake trout and smallmouth bass, have trouble reproducing at a pH of 6, which is only slightly acidic. Some clams and snails can't survive at all. Most crayfish are dead at a pH of 5. You can see how bad this is for the environment.
  • On average, a person in the US uses energy two times more than a person in Japan or West Germany does, and 50 times more than a person in India.
  • About 90% of the energy used in lighting a standard (incandescent) light bulb is lost as heat.
  • Air conditioning uses 10 times more energy than a fan, therefore, it creates 10 times the pollutants.
  • It takes half the output of the Alaskan pipeline to heat the air that escapes from all the homes in the US during a year.
  • Cars and pick-up trucks are responsible for about 20% of the carbon dioxide released into the air.
  • There are about 500 million automobiles on the planet, burning an average of 2 gallons of fuel a day. Each gallon releases 20 pounds of carbon dioxide into the air.
  • About 80% of our trash goes to landfills, 10% is incinerated, and 10% is recycled.
  • Since there is little oxygen underground, where we bury our garbage, to help bacteria eat the garbage, almost nothing happens to it. Scientists have dug into landfills and found ears of corn still intact after 20 years, and newspapers still readable after 30.
  • The average American makes about 3.5 pounds of trash a day.
  • In a year, the average American uses as much wood in the form of paper as the average resident of the developing world burns as fuel.


26 things we can do to help:

  1. Turn off lights.
  2. Turn off other electric things, like TVs, stereos, and radios when not in use.
  3. Use rechargable batteries.
  4. Do things manually instead of electrically, like open cans by hand.
  5. Use fans instead of air conditioners.
  6. In winter, wear a sweater instead of turning up your thermostat.
  7. Insulate your home so you won't be cold in winter.
  8. Use less hot water.
  9. Whenever possible, use a bus or subway, or ride your bike or walk.
  10. Try to buy organic fruits and vegetables if you're concerned about pesticides. (Organic food is grown without man-made fertilizers and/or pesticides).
  11. Don't waste products made from forest materials.
  12. Use recycled paper and/or recycle it. Reuse old papers.
  13. Don't buy products that may have been made at the expense of the rainforest.
  14. Support products that are harvested from the rainforest but have not cut down trees to get it.
  15. Plant trees, espessially if you have cut one down.
  16. Get other people to help you in your cause. Make and/or join an organization.
  17. Avoid products that are used once, then thrown away.
  18. Buy products with little or no packaging.
  19. Encourage your grocery store sell environmentally friendly cloth bags for people to use when they shop, or bring your own.
  20. REDUCE, REUSE, & RECYCLE.
  21. Compost.
  22. Buy recycled products.
  23. Don't buy pets taken from the wild.
  24. If you have a good zoo nearby, (if the animals are healthy and the zoo takes care of them), support it! Espessially if they help breed endangered animals.
  25. Don't buy products if animals were killed to make it.
  26. Cut up your six-pack rings before throwing them out.


ALSO... If anyone has any URLS to favorite GeoCities pages, please post them below. :)

Saturday, May 30, 2009

This Just In: Sprouting Rules!

I subscribe to a number of email discussion groups which talk about cooking techniques, recipes, and how to incorporate healthier stuff into one's diet. I consider myself to be something of a flexitarian: I'm not a big fan of red meat, and I avoid eggs because sunny-side-up is a royal pain in the ass to get right. However, I do like animal flesh from time to time (mainly poultry and/or anything in sushi form... mmmm, sushi!), and while I'm not majorly into other dairy products, I practically worship the ground that cheese walks on. Even so, many of my meals are vegetarian and/or vegan. I'm always trying to come up with cooking ideas that are interesting, fun, and not too hard on the ol' pocketbook.

A true favorite of mine when I lived in Redmond, WA in the 1990s was a snack called "Munchies and Crunchies." I could get these yummy little gems at the Safeway across the street from my apartment. They were basically a mix of peas, adzuki beans, and lentils with cute little sprouty tails on them. I loved them! True to their name, they were very crunchy and awesome for munching. I often craved the fresh taste and snappy texture, so it was with great sadness that I came to the realization that they were not available at any markets in New England after Fuzz and I moved here in 1999. (The time following was not without beseeching Google about "Where can I buy Munchies and Crunchies in Massachusetts?" / "How do you make munchies and crunchies?")

One of the discussions that I remember on a list years ago, was about "sprouting." There was this small faction of folks who'd fanatically proclaim to us all, "I'm sprouting! Oh yes indeedily-doodily, I love to sprout...Because I'M A SPROUTER!" I never really understood what "sprouting" was, though it seemed complicated and weird to me (I guessed they were alfalfa sprouts which required complicated tools and exotic hard-to-find supplies, as well as a large expanse of backyard in which to garden), plus I found their almost cultish enthusiasm more than a little off-putting. So I deleted those emails and moved on with my life.

Years later (about 3 weeks ago, to be exact), as I searched for ideas about what to feed my elderly pet rabbit in order to fatten him up after a bout of nasty health issues, I came across an online forum about making sprouts at home for pet birds. One of the things they suggested using were lentils. I thought, "What the hell!?" and poured half a cup of lentils (a bag which was supposed to go into a chili that I wound up being too lazy to make) into a big bowl of water to soak.

In the morning, I drained off the water as best as I could, rinsed the beans according to the instructions, and left things to settle. That was the night Fuzz and I went to see The Damned (who, by the way, gave an awesome performance! I especially loved how offended the youngsters were by their dirty jokes. Guess you can't make fun of pedophile priests in front of a Bostonian audience without ruffling a few feathers!)... by the time I'd given the lentils their final rinse, it was 2 a.m. and the little tails were starting to pop out. In just a few hours, these dormant dried lentils had come to life! I could hardly believe my eyes. These were a key component of Munchies and Crunchies, and I'd just made them! By myself!

The next day, the sprouts were even better! I rinsed everything and put them in an old pasta jar. I also did some research about how to keep the sprouts, and made some mesh tops for my jars -- yes, jars. (Fuzz brought me some whole peas a couple of days later so that I could make the most of my new experiment.)

It wasn't long before those lentils and peas had been eaten with gusto, and I was already starting in on my next batches. I'd gotten a bean mix from "seedmart" on eBay, and Fuzz surprised me with a bag of black turtle beans which turned out beautifully. My favorite are still lentils, which are the easiest of all (and great for beginners, hint hint!), and whole green peas. Best of all, I just finished my first bag of dried lentils after 3 weeks -- a bag which originally cost me just 80 cents! The peas were 95 cents, so this is an excellent pastime for anyone who wants to eat super-duper fresh produce and spend very little money. Plus, the best part is that you can make exotic salads and nonchalantly/proudly mention that YOU MADE the sprouts. It feels vaguely godlike -- I can see why those sprouters of years ago felt as if it were a religious experience.

EASY LENTIL SPROUTS FOR BEGINNERS:

Ingredients/Equipment:

1 very clean jar (save a pasta sauce jar and use that to start)
1 rubber band
1 bit of cheesecloth, mesh fabric, fishnet, whatever, etc. big enough to cover jar opening
1/2 cup dried lentils
about 2 cups cool water

Before placing lentils in the jar, rinse them in a strainer or a bowl big enough to allow you to stir them up well. Then, place lentils into your jar and fill the jar up with water. (Your half-cup of lentils will absorb water and become 2 to 4 times bigger!) Put your fabric over the mouth of the jar and secure with rubber band. Leave the lentils alone and let them soak for 8-12 hours.

After enough time has elapsed, dump the water (through the mesh) and add more, shaking the jar gently to rinse all the lentils. Dump the water again, and rinse a couple of times each day to avoid the growth of mold. The lentils will burst into life, and grow little sprouty tails! When you're satisfied with the size of the sprout, you're done! (You can eat them as soon as the sprout grows as long as the bean. The ones I did, pictured, got a little too long, but were tasty and healthy anyway.)

A few brief words of warning: Raw kidney bean sprouts are TOXIC. They will make you very sick, or kill you, so cook kidney sprouts before you eat them. Other sprouts, such as lentils, peas (whole peas only; split ones don't sprout), adzuki beans, and chick peas are safe and yummy raw. Also, do not feed sprouts of any kind to your pets until you're 100% sure they're safe for the animal to eat. Ask your vet or favorite animal expert. (Apparently bunnies like lentil sprouts, but I wanna check with my vet first!)

Sproutpeople.Com also has a ton of information. You can also get more exotic bean mixes there, as well as fancy supplies. :)

If you want to see videos about sprouting, check out these awesome folks! First, have a look at these wacky New Zealanders' video, which explains it perfectly!


...And, there's also this adorable Canadian girl showing us how to make broccoli sprouts from little seeds!


Related Posts Plugin for WordPress, Blogger...