Showing posts with label frugal. Show all posts

Saturday, July 26, 2014

Fresh Blueberry Cobbler for the Bakingly Challenged

A cozy home scene: Baked goods and skulls!
I once had a recipe for "mock cobbler" that rocked my damn world.  No idea where the hell it went, though.  Someday I'll find it again, maybe.

But this is a story about blueberries.  I am not a big blueberry fan, having eaten about 9 thousand tons of them one summer afternoon in my youth.  My older brother and I were afflicted with the worst attack of food poisoning that the planet had ever known.  Fortunately, our vomming urges seemed to be in perfect sync; first one of us would have to run to blow some blueberry chunks, and then a few minutes upon that kid's return, the other would begin to heave.  We gave one another reports on the color, amount, and consistency all afternoon until finally, the torturous barfing finally ended. 

But, I digress!  I recently came into about 3 pounds of blueberries that needed to be used up before going bad!  At first, my plan was to make a lovely pie or two, but bugs in the flour ruled out that option.  (Despite the bonus protein that the bugs provide, I've gotta draw the line somewhere.)  Here's a great recipe for blueberry cobbler that hopefully won't remind you of the above story.  I did find a box of bug-free Jiffy mix, so decided to make cobbler instead.  I divided the batch into two pie plates to make it seem more pie-y.  Why the hell not?

Hopefully, the recipe below won't remind you much of the Vomit-Fest story above.  If you visit me and I bake this for you, eat all you like -- I still have an aversion to blueberries!

INGREDIENTS:
3/4 cup of water
1 cup of flax milk
4 cups of blueberries
4 tablespoons of butter
3/4 cup of sugar
2 cups of Jiffy biscuit/baking mix
1/2 teaspoon of salt
1 teaspoon of cinnamon
1/4 teaspoon of ginger

Here it is, all raw and yummy. No canned pie filling required.   
DIRECTIONS:  This is super easy to make!  First, preheat your oven to 400 degrees.  Spray your cobbler dish (or use some pie plates like I did) and put your blueberries in the bottom, then sprinkle with spices.   In a separate bowl, mix the Jiffy, salt, and butter together until it's grainy and pea-like in consistency, then pour in the milk and continue to knead until the milk is thoroughly incorporated.  Crumble (or rip apart) the biscuit mixture, and then add dollops of it to the top of the berries.  Then, sprinkle the sugar over the biscuit blobs and berries.  Pour the cup of water over the whole thing, and pop into the oven for about 35 minutes.  (I turned my oven off and allowed the dishes to stay in there for a little while after.)

The recipe yielded a cobbler that was a bit runny, but still not bad.  The biscuit bits were surrounded with delicious berry syrup, and it wasn't too cinnamon-y for me.  Next time, I think I'll add my spices to the sugar, or at least sprinkle a little cinnamon on the top of the cobbler.  I may also mix the blobs and berries together next time, just to see if it makes a nicer variation in consistency.

Btw -- the original cobbler recipe can be found here on the Jiffy site.  I added my own twist to it, but the good news of it is that you can use pretty much any fruit that you've got, even mix it up, as long as you get to about 4 cups of fruit.  Pretty awesome, eh?

This dessert microwaves well the next day, too, by the way.


Wednesday, October 2, 2013

Keeping Those Monster Cereals Fresh!


I'm the type of person who loves Halloween.  I mean, loooooves it!!  (You can tell by all of the cool pumpkin and Halloween-related shit that I post here.)  When the the General Mills Monster Cereals became "restricted" to seasonal items only, I was super sad.  But, when it becomes available once again, I get very happy.

One thing that I do not looooove, though, is trying to reduce my carbs.  I have recently lost about 25 pounds, and I still have many more pounds ahead of me.  So, when the craving for something sweet hits me, cereal can often hit the spot (Count Chocula, I'm specifically looking in your direction!).

My biggest problem with all cereals is that, by the time they get to the end of the box, they're all stale and yucky and gross.  Plus, I hate cereal dust!  I've fixed this problem by biting the bullet & buying plastic "snack bags" for those days when I need to take my food with me.  They work great with cereal, too, for those times when plunging a hand into the cereal box and scarfing down who-knows-how-many grams of sugar just isn't going to cut it.

I am storing my single-serve "100 calorie packs" in the boxes that the cereal came in.  After these are done, I'll get some Frankenberry and maybe even some Fruit Brute!  These will ensure that my breakfast is fresh and spooky for weeks and weeks to come! :)

Tuesday, May 21, 2013

I Love Kala Namak Black Salt!

Kala namak is also known as "black salt." Usually it comes from India, and is often a pale pinkish or grayish colors.  You can see the picture that I took of my newly purchased black salt... It consists of a strong flavored salt with extra minerals. There is a sulfur flavor in there too, which some may find icky but I love it!

My need for kala namak originated from my desire to make vegan eggs. I usually do tofu scramble, and have my own special blend of seasonings, but last year I learned how to make vegan sunny-side-up eggs (Thanks to "The Airy Way"!) and was informed that the black salt can really add something tasty to this dish.

My search online showed that black salt can be expensive, but Fluffy grabbed me a pack at his local Indian grocery for a mere 99 cents!  It is packaged by Maya Overseas Foods Inc. and seems to be of perfect quality. I'll be making my next vegan egg attempt soon, so watch this space for details! :)


Saturday, December 15, 2012

Picadillo Time!

Well, it's been a few months... and I've done a few things that I've wanted to post sooooo badly!  But for some reason, I've been kind of lethargic about that stuff.  I think the relocation just hit me harder than I realized it would!

But, after weeks of being like "Oh, this would be such a fun thing to post on PGS!" today I was like, "Screw this, even my humble dinner recipe HAS to be posted!"  So today, since a bad cold has been kicking my social circle in the ass all week long, my friend Fluffy and I decided to make some yummy spicy picadillo for dinner.  Fluffy and I shared the picture-taking duties.  Here's my recipe, and no, it's not really authentic at all.  But it IS inexpensive, forgiving, great for when you have (or need) lots of leftovers, and aside from the ridiculous amount of sodium, can be quite nourishing and yummy.

INGREDIENTS:

Solids:
* 1 lb ground beef (preferably quite lean, 'cause draining it is a pain in the ass)
* 1 lb ground turkey
* 1 10-oz package of Morningstar Farms "Grillers" crumbles (or your fave equivalent)
* 2 huge-ass chopped red, white, or yellow onions
* 1 red and/ or green bell pepper (use half of each, or one whole one of each if you love peppers... you could even go crazy and add a couple of jalapenos or banana peppers)
* 1/2 cup diced celery with chopped-up leaves for flavor
* a few tablespoons of capers
* 1 1/2 whole kosher dill pickle, or 1/2 cup olive style of your choice (I want olives, but Abil {A Boy I Like} has a psychic allergy to them, so pickles it is!)

Liquids:
* 1/2 cup wine; marsala is recommended
* EITHER the small can of tomato paste (how many ounces is that? 6?) or a 14-ounce can of chopped tomatoes
* water
* A splash of red wine vinegar or pickle juice -- hell, use both like I do!

Spices:
* 1/2 teaspoon crushed dried rosemary
* 1 tablespoon dried garlic or garlic powder (use to taste; I like a lot)
* anywhere between 1 and 5 bay leaves; use your favorite number.
* a big pinch of allspice & a big pinch of clove (optional but yummy)
* 1 1/2 tablespoons cumin
* 1 tablespoon paprika
* 1/2 teaspoon black pepper
* 1/2 teaspoon chili powder
* 1 teaspoon hot red pepper flakes (use to taste)
* 1/2 teaspoon oregano, thyme, or basil
* Optional: a few drops (or gallons) of Frank's hot sauce!
* Also optional:  A packet of Sazón Goya, for that delicious hit of MSG.  I would avoid adding any additional salt, as the pickled stuff and cooking wine has plenty.

Gases:
Not 'til later! ;)


Step 1.  Chop that onion and celery, get it sweating over the stove!  Use some olive oil if you have it, or just a bit of cooking spray.  Medium or low heat should do it.  Cook until the onion is see-through-ish and/or brown. 

Step 2.  Dice your peppers, process your pickles (either digital or analog methods will work fine), and get your spices ready while you wait for the onions to be translucent. 


Step 3.  Toss all that shit -- your peppers, your spices (except the Goya, the bay leaves, and the Frank's) -- into the pot!  It's better to put your spices in while the veggies are cooking so that they get coated with delicious seasonings right away. 

Step 4.  Add your tomatoes and/or paste, swirl it around until it's evenly mixed.

Step 5.  Add meat, breaking it up into luscious chunks.  Turn up the heat if you need to.  If you want a vegan recipe for picadillo, you can always substitute your favorite meat analogue for the turkey and beef as well; nothing else in this recipe is animal-based.  I have tried it both ways, and it's awesome no matter what protein you like.

Step 6.  Here is where you add everything else: the wine, the vinegar, the "Grillers," capers, pickle, bay leaves, Sazón if you choose to use it, and just a bit of hot sauce -- you can adjust the heat later.  Stir everything up until it is mixed well, then add plenty of water.  Ideally, you want the entire mess to be completely covered and then some.  (This picture was taken after about 45 minutes of simmering, so keep that in mind.)  At this point, get the heat to medium-high, and then turn it to low after it has begun to boil.  Stir it now and again as it simmers, making extra sure to scrape the crap at the bottom of the pot so it doesn't stick and burn.  No one likes a ruined picadillo, except maybe your pet rats, but they really shouldn't be eating onions or garlic.

Here it is, bubbling frantically on the back burner!  It's almost done after about an hour...  Keep stirring and waiting.  I bet your kitchen smells awesome right about now!  Reminisce with your friends about how, years ago, this would be right around the time you'd be getting ready to go out clubbing... and then you eventually had other things consuming you, like arthritic hips and finding ways to pay for your Geritol addiction.  Ahh, memories!

And now, approximately an hour and a half after adding the water and crying over your lost youth, the picadillo has come to the perfect consistency: The liquid has reduced beautifully and everything has come together perfectly, so now it's almost the consistency of chili or a dense meat sauce.  There will still be some yummy liquid floating around in there, but it's fine and delicious.


 DONE!  Serve over rice and enjoy it!  (Also, marvel over how your new iPhone makes everything look 109482983958 times nicer than the crap-ass old cell you used to take kitchen pics with... wow!)

Thursday, March 8, 2012

Febreze For People

The downside to having an awesome Body & Soul party was that I seem to have contracted some form of plague from one of our party guests.  I guess that the fun of that wonderful cooking and being psychic came with a price!

Anyway, this morning I'm off to our local clinic to get myself tested.  I've got a VIP houseguest in a few days, and I don't want to pass along the plague!

Sometimes, when you get sick and you're taking antibiotics OR you're reluctant to hop into the shower first thing in the morning because you worry about going outside with a wet head, you may want to hold off showering until later in the day.  Or, maybe you have some emergency errands that needs to be done PFQ.  Perhaps you've just finished a yoga class, but forgot about that important meeting which starts in (uh oh!) just 15 minutes!  Mayhaps you've woken up to no power or hot water (holy crap-oly!!)... Whatever the situation, there may just come a day where you're in need of some alternative solutions.  Don't worry, I'm way ahead of you.  It is in this spirit that I bring you my recipe for "Febreze for People."


INGREDIENTS:
1/2 cup of your favorite lotion, preferably clean-smelling! Think citrus and/or minty!
2 tablespoons of denatured alcohol (rubbing alcohol or hand sanitizer works fine)
3/8 cup of water
OPTIONAL: 1-2 drops of citrusy, tea tree, or mint essential oil

Mix everything together, except for the water.  Pour into an 8-oz(ish) spray bottle, top off with the water, and shake well.  Whenever you don't have time for a shower or bath, use this solution as a quick refresher.  Just spray it onto your body, wipe with any soft cloth, and rub in the excess.

Depending on the lotion, you can use it on your face (don't get in eyes) as an emergency makeup remover.  Don't use in your hair or it'll get way greasy -- if your hair feels icky, just use a bit of baby powder to freshen it before your important event.

Saturday, February 11, 2012

99 DIY Lifestyle Skills

Being a do-it-myself kinda gal, I have to say that this post at over at TLC intrigued me.  I went through the list, sort of halfway nodding my head, and then I realized that there are a lot of things on the list that I can work toward, either now or after I've relocated.  Feel free to check and see how you're doing.  I'd also love to hear more unlisted skills that those reading this deem to be valuable.

My personal grading scale: 0 - not doing this, or it doesn't apply to me, .5 - I know how to do this and have been working on doing better, 1 - this is a regular part of my life.

Essential Food Skills
1. Read and understand product labels 1
2. Bake bread 1
3. Make your own bread starter and keep it going .5 (I don't consume a lot of bread)
4. Make cheese, yogurt, and kefir from local milk .5 (I can do all but kefir)
5. Preserve food by canning 0 (scary!)
6. Preserve food by drying .5
7. Forage for local wild foods safely 0
8. Raise a couple of backyard chickens 0 (I wish I had the room!) 
9. Make your own tofu,tempeh, and soy milk .5
10. Eat locally and in season 1
11. Grind your own flour .5 (I've done it)
12. Grow your own produce 0
13.Grow your own herbs 1
16. Have a repertoire of vegetarian recipes you can use for various occasions 1
17. Fish or hunt responsibly if you eat meat 1 (I don't hunt, but I know the basics.)
18. Make homemade pastas and other pantry basics  .5
19. Cook a variety of foods well 1
20. Utilize a menu to minimize food waste 1
21. Throw a party without compromising your green values 1
23. Sharpen kitchen knives so they last 1
24. Make homemade granola bars, granola, waffles, and other breakfast items 1
25. Make baked goods from "scratch". 1
26. Understand terms like, "organic", "Fair Trade", "all natural", and "GMO" 1

Essential Household Skills 
27. Sew well enough to repair clothing 1
28. Sew well enough to make your own clothing and reusable shopping bags 1 (not all of my clothing is handmade, but several pieces are, as well as my storage.)
29. Sew fitted cloth diapers for your baby 1 (do bunny needs count?)
31. Know how to reupholster a chair .5 (I know how to, and have done it - just not WELL.) 
32. Make your ownlaundry soap 1
34. Make your own house cleaning supplies .5
35. Use diatomaceous earth, bay leaves, and other "eco-friendly" natural pest deterrents 1

Home Maintenance and Repair Skills 
36. Use non-electric appliances rather than electric 1
38. Program a thermostat .5
40. Use 0 VOC paint 1
43. Make simple appliance repairs such as replacing belts 0
44. Find what you need by bartering, or using CraigsList, eBay, and thrift stores 1
45. Repair a leaky toilet 0
46. Repair a leaky faucet 0
48. Check your home for energy leaks using incense, a candle, or a device that is created for that purpose 1
50. Insulate an attic with eco-friendly insulation 1

Gardening Skills 
52. Use compost to enrich your soil .5
53. Plan a garden for your climate .5
54. Understand xeriscaping 1 (kinda)
55. Plant a multi-seasonal vegetable garden 0 (no room! wahw!)
56. Build a simple cold frame for salad all year 0
59. Use a manual reel mower 0
60. Use companion planting methods to control pests 0
61.Build a bat house to encourage bats and decrease mosquitoes .5 (soooo want to do this!)
62. Use predator insects like Praying Mantis to control garden pests 0
63. Know what heirloom seeds are and why you should use them 1
64. How to plant open pollinated vegetables for best yields 1
65. How to save seeds from your own produce 1
66. Plant trees and bushes to cut your energy bills 0 
67. Use soaker hoses to conserve water 0
68. Sharpen and maintain tools 1

Health Skills 
69. Know how to use herbs and natural remedies to treat common illnesses 1
72. Use essential oils for health and cleaning 1

Transportation Skills 
75. Do simple maintenance on your car  0
76. Arrange or locate a carpool 0
77. Learn to use hypermiling techniques 0


Energy Skills 
80. Install a solar panel 0
81. Know where to find the most eco-friendly, green power source available to you 1
82. Connect home electronics to power strips for easy shut off 1

Conservation Skills 
85. Use email rather than conventional mail 1
86. Switch to a paperless office .75 (I am soooooo close!)
87. Locate the local library and use it rather than buying books, DVDs, and tapes 1
88. Adjust your settings on the computer to make it more energy efficient 1
89. Use skype and other technology to limit the need for travel to conferences 1
90. Learn to plan eco-friendly vacations, such as camping (and leave no trace) 
91. Replace a hobby with an environmentally friendly hobby 1
92. Locate and use recreational green spaces such as hiking trails, parks, and public gardens .5
93. Understand and be able to explain what cradle to cradle means 1
94. Understand and be able to explain what carbon emissions are 1
95. Understand and be able to calculate a carbon footprint as well as explain what it is 1
96. Know where to recycle technological items like computers, microwaves, televisions etc. 1
98. Know where reusable items can be substituted for disposables 1
99. Understand and be able to explain cap-and-trade 1


My final score = 68.25%
Hmmm, that's a "D."  To be fair, a lot of it is stuff I can't help (like keeping chickens or installing solar panels, as I'm not a homeowner).  But I should try harder on the stuff that I can change!  Still, that was pretty interesting.  I'll have to see how I can streamline things a bit.

Thursday, February 9, 2012

February's Body & Soul Party

My friends and I decided to throw a party this month!  We called it the Body & Soul Party, and invited ladies who needed some extra pampering.  Each of us had a skill -- between us, there was an esthetician, a professional stylist, a licensed masseuse, and me -- a professional psychic and gourmet cook!  I can make more than disco fries and choochacheechachoo, you know. ;)

We all used our talents to create a night of home-spun luxury, style, and general fabulousness.  The services offered ran the gamut from professional facials and waxing, to hair-cutting and styling, to spa-quality massages, to real psychic readings.  The party ended with all our guests feeling a little more pretty and/or handsome, as well as relaxed and rejuvenated.  A great time was had by all!

My biggest regret is that I failed to get pictures of my food platters!  I made stuffed mushrooms with lemon-herb filling, vegetable nigiri sushi, and fruit salad skewers with a myriad yummy things.  The rice could have been cooked a little better, but overall I'm pretty pleased with my cooking efforts.  We're already dreaming up new ideas for next month's B&S party, and I'm planning my next menu.

If you're in the New England area and you are interested in attending, feel free to visit our website at www.DawnSoul.com :)

Saturday, August 27, 2011

Easiest Candle Making Technique Ever!

I love, love, love making candles!  It's one of the funnest and easiest crafts that I know of.  I mean, how can you go wrong?  Just melt a bit of candle wax, position your wick, add whatever colors or scents you like (crayons and essential oils or even perfume will work just fine), pour the whole thing together, and wait 'til it's firm.  I've been making my own candles since the 1990s and just love the entire process.  It makes me feel so creative and clever to use up my leftover waxes this way!  I also get the added satisfaction of knowing that my candle is unique; no one has quite the same color or scent that I do!

That said, pouring candles can be a real pain in the ass if you don't get it right.  The wax can form ugly lumps and bumps, you can find bubbles inside that compromise the burning smoothness, and sometimes the best-laid shapes will go awry.  And long, skinny candles -- well, forget pouring those!  Dipping takes too long (though admittedly, I have not tried it very thoroughly: maybe I'll do it sometime).

If you're a first-timer or you're in the market for an easy candle project, you can buy yourself some rolls of beeswax at your local craft store.  They also come in candle-making kits that couldn't be simpler.  Place your wick on one side of the wax sheet, roll it up, and Bob's your uncle.  It's lovely and takes only a few minutes.

In the same spirit as the roll-your-own-beeswax candle, I have created a terribly easy candle recipe that would make any star of the most recent episode of "Hoarders" stand and applaud vigorously. ;)

INGREDIENTS:
* Something for a wick (natural fiber string, rope, kitchen string, or buy yourself some commercial wick from the craft store.)
* One bag of your favorite wax-covered Laughing Cow cheese. (Bonbel and Babybel Light use red wax, and their Cheddar variety is coated in yellow wax.)

These candles are romantic and decadent,
not at all cheesy! Available in classic Babybel, or Cheddar.
Step 1.  Eat the cheese as you normally would, storing up all of the awesome wax!  Resist the urge to play with the wax... it's hard, but you need to restrain yourself.  Pick the wax apart so that it's in half-circles or anything flat.

Step 2.  [If you're very anal about germs: wash the wax in cold, slightly soapy water. Soak for a bit, rinse, then allow to air dry undisturbed over the course of a few days.  If you don't care about getting cheese particles in your candle -- and trust me, it's not all that much anyway -- read on...]

Step 3.  Cut your wax into strips and wind it around your wick.  After you've made a nice long, tall strip, wind more wax strips around your first coat.  (It is this step where you can rub a bit of scented oil over your wax strips if you like -- I did roses on mine, and now they smell like roses dipped in cheese.)

Step 4.  Repeat until all of your wax is gone, or your candle is sized and shaped the way you want it.

Step 5.  Put in a candleholder (or a glass filled with pretty stones, as shown) and light, enjoying the dark romantic ambience of your super-easy craft!


Friday, August 19, 2011

On My Mind: Spiritual Bath

I just came across this charming post at the simple-living blog "Down To Earth" which encouraged its readers to share a photograph and to explain a bit about it.

The one that I chose was this picture, which I'd recently taken and had been meaning to add to my blog for some time now.  This past year, I had recently discovered how wonderful it was to take a long, luxurious soak in the tub.  One of the awesomest things about taking a big ole' bath is that anyone can do it.  Doesn't matter if you're old, young, rich, or poor -- if you have access to a tub and some water, you can make it an amazingly sensual experience no matter what other accoutrements you choose to add.

There's a joke that goes something like, "You know you're ghetto when you break out your best dish detergent when it's time to take a bubble bath," but really, who cares?  It makes no difference if you bathe with a 3-for-99-cents bar of soap from the dollar tree or a pot of $140 Russian Amber shampoo by Philip B., you can make your tub time truly luxurious with only a few little additions.

I like to add a few candles on the edge of my tub; they need not be expensive (and if you can make your own candles out of leftovers and an old spaghetti jar, so much the better!) but they certainly can lend an air of tranquil pleasure to your bath.  You can even find an artificial candlelight generator app on your Android phone (if you're so blessed), which I've done more than once.  The one I have (which I downloaded for free) even gives you customizable flame colors -- purple flame, anyone?

And bubbles are nice, but not always necessary -- by the way, I recall a few times where my own mother broke out the Ivory or the Palmolive dish liquid when, as a child, I craved bubbles in my bath.  If it's not going to harm your skin, who really cares?  No shame in being creative.  These days, I save my pennies for the luxury of something special from the Lush store when I can get it (and use it carefully).  But even bubbles from your dollar store or local pharmacy will do the trick wonderfully.

Some folks choose to do their entire beauty regimens in the bath -- shaving legs, deep conditioning hair, even wearing a facial masque while splashing away in the tub.  And some people bring a cocktail (or in my case, a nice cold can of soda) into the tub, sipping their cares away.  Or, you can just relax and allow your tension to melt away, enjoying the sights, sounds, and scents of your spiritual bathing experience.  The bottom line is that your bathtime rituals can be fully customizable and specifically tailored to your needs and wants.

So grab your rubber ducky, and your favorite towel, and enjoy!

Friday, August 5, 2011

Swiffer Stuffs

As most people who know me are well aware, I love to make things.  Cooking is one of my true passions for this very reason: It's quick, most endeavors are relatively inexpensive, and the end result can be used in practical, smart ways that don't end up in a lot of clutter.  You eat it, you poop it out, and Bob's your uncle -- creativity recycled!  

I don't like projects that take forever, or that clutter up the house.  As a serious fan of the Swiffer from when it first came out (and yes, I still have the 1999 Swiffer, which is more sturdy than my 2006 version), I've always considered the replacement covers something of a luxury... if I am dusting, I'm not above twisting them over so that the dust-free side can get its share of use as well. ;)  I've also used things like socks and washcloths for covers when wiping floors that need a bit of wet attention -- and for the most part, these have been successful undertakings.
But I've also wanted to try making a cover that was specifically designed JUST for the Swiffer.  And even though I'm capable of knitting only a simple garter stitch, knitting reusable Swiffer covers out of yarn is just about the easiest thing anyone can do.  Here's how! :)

1.  Choose your medium.  You can see from this picture that I used two different kinds of standard acryllic yarn -- the pretty lavender kind was the last of a soft skein of nicer stuff from JoAnn fabrics, and the burgundy was from a 99-cent store in NYC.  Just use whatever you have; after all, it's not a beauty contest if it's just going to be scrubbing the scum around your toilet.

2.  Knit!  Cast on about 33 rows.  (I used this number because it was my age when these pictures were taken... yeah, these sat around awhile!)  Knit a plain ol' garter stitch until you have a rectangle that pretty much covers your Swiffer.  Your mileage may vary, depending on how tightly you make your stitches and on what size needle you like (I used a size 10), but mine are generally somewhere within the neighborhood of 50 and 70 rows.  It is OK if you knit it to be just a tiny bit too small... keeps the cover on even better, in fact.

3.  Take your rectangle, and fold it into thirds.  The Swiffer will fit into the opening between the thirds.

 4.  Stitch the sides together.  Use anything you want -- more yarn, thread, whatever.  (I used a hideous baby-weight rainbow yarn that I have noooooo idea what other uses I can find for it!)  You could probably even glue or staple them, but that seems like a hell of a lot of trouble, and would likely require many goings-over.

5.  Put the business end of your Swiffer into the horizontal opening.  You can punch the cover down into those annoying little tabs if you want, but honestly I never do, and my Swiffer covers never go anywhere.

6.  If you're dusting, flip it over!  If you're washing something hard-core, flip it over! (Unless the dirty item in question is way too nasty to handle.)
7.  Mine are machine-washable (depends on the yarn you use) and durable.  See the lavender ones in this picture?  They were made about 2 years ago, and are just beginning to get old.

You can also use these without the Swiffer, but it's not quite as much fun.

Monday, July 11, 2011

For the Love of LUSH


Some of my favorite "guilty pleasures" in the world can be bought at the LUSH store. The way I see it, that's not such a bad thing -- LUSH won't make me drunk-dial an ex, give me lung cancer, or raise my cholesterol. That said, it can be somewhat pricey if I need a good fix. Ergo, I have compiled a list of helpful hints and tips to enable you to get the most out of your LUSH stash.

The best advice I can give to anyone who's into LUSH (or thinking of taking the plunge into addiction territory), is to buy what you truly love, but be sure to concentrate on the products that you're actually going to use. Even if you're able to make a killing on a 2-for-1 special at your local LUSH dealer, letting your stuff sit around unused is a sin and a serious waste. Certain items are one-use-only, which are fine for occasional splurging, but to get the most bang for your buck, concentrate the bulk of your LUSH funds on items which will last awhile. Here are my favorites, along with a few tips on how to make your stuff last...

1. SOAPS. While I'm not a bar-soap kinda gal, I have to admit that this is a seriously smart way to get the most for your money. A slice of LUSH soap can be had for anywhere from $6 to $10. While this does seem pricey when you compare it to your typical 3-pack at the 99-cent store, a bar of richly scented LUSH soap can be a real luxury during a quick shower, or even soaking in the bath. One of my personal favorites is the goth-tastic "Demon in the Dark," a minty apple-clove scent that lingers for hours on your skin. Another awesome pick is "Ring of Roses" which is referred to as a buttercream-style soap for its delicate consistency; this is another luscious scent that lasts on your body for quite awhile after your final rinse. For those of you who are looking for something a bit more perky, you may enjoy "Rock Star," described on the LUSH website as a "creamy vanilla sweetie" and comes in a bubblegum pink shade. (I have never used "Karma" soap, but it sounds like it may be one of those long-lasting scents as well. Anyone?) To make your soap last longer, store it in an airtight container away from the shower's disintegrating spray, and only bring it out while you're using it. I also find that using a bath puff or washcloth can help extend the life of your soap. For a bathtime treat, add a bit of water to your container in order to keep your soap nice and soft; dissolve the mushy bits into your bathwater, and enjoy the scent. Or, just use the soap blobs on your puff this way; since only a pea-sized amount will be needed to get you nice and clean, you'll have plenty of showers and baths to enjoy.

2. MASSAGE BARS. A LUSH massage bar is a true luxury item. Smoothing one of these on my skin at night makes me feel as if I'm really pampering myself -- the girly nightly beauty ritual, the lovely scents of each bar, and reaping the benefit of all that soft smooth skin -- it's a wonderful experience. My favorite bar, hands down is the "Tuca Tuca" violet massage bar; at $7.95, it's a real bargain as mine have lasted for weeks and weeks of somewhat regular use. (LUSH also makes a "Tuca Tuca" perfume spray, so this is a great way to try out the scent before buying a bottle of perfume that you may or may not enjoy!) Most of these bars cost a dollar or two more than that, but all are well worth the price due to the effectiveness and the long-lasting joy that they'll bring you. Another great one to try is "Wiccy Magic" -- it's pretty big, fits right inside the LUSH tin with no room to spare! -- and the spicy smell lingers all over my sheets for days after I put it on at night. LUSH massage bars are so lovely and effective that I don't use them every single night, but I do fairly often. They last a nice long time, and so do the great scents and the benefits. It makes them well worth their cost.

3. LIQUID SHAMPOOS/SHOWER GELS. This is what I'd call an absolute "must have" in my LUSH stash. The gels are great for washing your hair, washing your bod, even a quick squirt to hand-wash your delicates in the sink (if you care to "waste" it on your clothes -- though I don't consider it a waste when I can smell the LUSHy goodness all day on my clothes!). You can buy the smaller 8-ounce bottles just to get a feel for something (usually they're around $18), or go wild and get an all-out huge16-ounce bottle of your favorite scent. At nearly $30 for most of the bigger bottles, you might go "Aw hell no!" but trust me -- that big bottle will last you a long-ass time. The beauty of LUSH shower gel is that a little bit goes a very, very long way. The strongest one I've used yet is called "Glogg" and was, regrettably, only available during the winter holiday; I got a tiny bottle in a Christmas gift basket and absolutely adored it. If it's around next year, I fully intend to see about getting a big ol' bottle of it again -- the scent was a heady cinnamon that just HUNG in the bathroom for hours after my shower, and it left my hair smelling good enough to eat all day long. I used it on Wednesdays only, and it actually lasted me a few months! Right now I alternate between "13 Rabbits" which is a chocolatey-ginger scent (not that long-lasting, but does smell strangely good, lathers beautifully, and rinses cleanly) and my trusty old "Flying Fox" honey-jasmine, which I'm just starting to run out of after being positively lavish with it in my baths and showers. "Dirty" is nice too, even if it's technically for guys; it has a lovely clean, minty, herby smell that you can carry with you or even layer if you have the perfume -- I got a sampler box for $20 which contained a shitload of great products to try. One fair warning: LUSH shower gels seem to be a bit harsh on my hair color. Nevertheless, I love the luxurious feeling they give me!

And now... things to avoid... the answer is: nothing! It's great to try things. If you shop at the store, you can even see what kinds of samples you can get. The staff often has little trial-sized sample pots for sale for a couple of dollars, and this is a wonderful way to explore without feeling hosed. I would avoid going out of my way to buy things like bath bombs or bubble bars, since many of them can only be used once or twice (though the jumbo bubble bars are good for several uses). Also, the toner tabs are fine to try, but not terribly cost-effective at around $2 for a one-use product. That said, they can be wonderfully refreshing and nice if you're in the mood for a treat. The water of the tea-tree toner tab can be saved for a little while in the fridge and used as a spray too, so this double-duty product is worth consideration. If you really want to give yourself a little something nice, check out (or ask someone for) a LUSH gift basket packed with lots of special little things so that you can revel in an array of products at your leisure.

Enjoy! :)

Saturday, May 21, 2011

Lazy Woman Casserole

I probably shouldn't call it "Lazy Woman" Casserole, but what the heck?  I've made it on days when I've been super-busy, AND on days when I've been just feeling kinda lazy and not terribly keen on making a gourmet masterpiece.  I have degenerative disc disease, so sometimes all I can really manage is standing for about 5 minutes before my pesky ole' L4/L5 region gets the best of me.

When I look at the pictures of this thing, I have to tell you that it doesn't look all that appetizing.  And as one Amazon user put it, "Sometines you just want one of the original 'fast foods' that your mother/grandmother heated up," this isn't necessarily something healthy enough to make all the time.  That said -- it's quick, it's easy, and most of the non-staple ingredients can be stored in the freezer or pantry forever until you're finally ready to put it together.  (Well, frozen veggies are a staple in MY house, anyway!)  The veggies give it the illusion of a balanced meal, but you can always add more to the batch, and serve with a salad, if you want to give it an even healthier kick.


LAZY WOMAN CASSEROLE:

Ingredients:
2 4.9-oz boxes of Betty Crocker au gratin potatoes (or generic equivalent)
4 cups of hot and/or boiling water
1 cup of milk
1 bag of frozen veg (I like "California Mix" which is a blend of broccoli/carrots/cauli; but use your fave!)
1 8-oz bag of shredded cheddar cheese.
between 2-4 tablespoons of butter or margarine (package calls for it, but totally optional!)

1.  Preheat your oven to 350 and spray your casserole dish with cooking spray.  Some people like to defrost their veg in the microwave around this time (like me -- I enjoy my broccoli in the softest capacity possible) but if you want a bit more "bite" to those vegetables, don't bother.  The broccoli WILL get super-duper soft if it is thawed first, and this isn't a texture that everyone on Earth enjoys!

2.  Dump the hot water into the casserole dish along with the potato packets & special sauce packets that come with the potato mixes.  Stir 'em up, then add your milk and veggies.

3.  At this point, if you wish to incorporate a handful or two of cheese directly into the potatoes, feel free to do so.  Otherwise, just dot the top with your butter/margarine if you're using it -- I cut mine into little bits and stick 'em around the edges to keep things adequately lubed during cook time.  (If not, I would recommend spraying the top with a tiny bit of cooking spray just in case.)  Then pop this sucker into the oven *uncovered* and let it cook for about 30-40 minutes.

4.  After this time has elapsed, open your oven and dump (remaining?) cheese over the whole thing.  You can sprinkle a little paprika onto the casserole as well, if you want to fool people with a majorly sexy "oven-browned" texture.  Mua, ha, haaah!  Leave it in the oven for another 10-15 minutes to let the cheese melt.

5.  When the timer sounds, take these out of the oven and let them sit for at least 15-20 minutes.  Trust me, this is HOT and will burn the heck out of your mouth and throat if you dig right in!  If you can wait even a bit longer, that'd be even better.

 6.  Refrigerate any unused portions, and believe me, this makes quite a bit, so there will definitely be lots of yummy leftovers.  These are even better the next day!

Saturday, April 16, 2011

March Decluttering Report

March was a rough month for me, with all of the medical and health-related shit that I needed to take care of... however, I did very well this March!!  We continued filling boxes for donation, and selling those extra books and things on Half.Com.  Overall, I'm very pleased with the progress that has been made here. :)  I fully intend to keep the donations going. :)  It feels awesome to be able to clean my closets while I'm helping other people at the same time.  Next stop -- getting those pesky closets investigated, and unloading all of the junk therein... today the closets, tomorrow the basement.  Well, maybe.  I'll see how well things go over the next couple of weeks. :)

Here is a lovely picture of my beautiful rat, Delicious.  She's a real looker, isn't she?  The crazy ones usually are, with only a few exceptions (i.e. skeezy ex-boyfriends).  Anyway, I adore her, and I know she loves (the yummy taste of) me.  She's a biter, all right!  But because I am trying so hard to change my ways, this sweet li'l bub is the only pack-rat that's allowed in my crib. ;)


MARCH's PROGRESS:
~~~~~~~~~~~~~~~~~~~~
boxes donated: 3 (1 large, 2 smallish)
cause(s) helped: Big Brothers & Sisters
type of donation(s):  clothing, kitchen wares, books & videos, health & beauty

Items sold: 5 via Half.com
sold items: DVDs (1),  CDs (2), books (2)
profit*:  $28.96


NEXT PICKUP DATE:  April 20th 


YTD PROGRESS:
~~~~~~~~~~~~~~~~~~~~
boxes donated: 6 (2 large, 2 medium, 3 smallish)
type of donation(s): clothes, kitchen wares, toys, books, health & beauty items, videos

Items sold: 16 via Half.com
sold items: DVDs (4), video games (1), CDs (3), books (8)
profit*:  $81.07


*Technically, this isn't "profit" since I probably paid more for the items in question -- but since I am relinquishing unwanted items, I count it as a profit. 

Wednesday, March 9, 2011

February Decluttering Report

Well, unfortunately, February wasn't quite as awesome as January was.  However, I was able to keep up my momentum on ridding myself of the books, at least!


FEBRUARY'S PROGRESS:
~~~~~~~~~~~~~~~~~~~~
boxes donated: 0
cause(s) helped: (didn't donate this month)
type of donation(s):  (didn't donate this month)

Items sold: 8 via Half.com
sold items: DVDs (3), video games (1), CDs (1), books (3)
profit*:  $36.96


NEXT PICKUP DATE:  TBA (sometime this month!)


YTD PROGRESS:
~~~~~~~~~~~~~~~~~~~~
boxes donated: 4 (1 large, 2 medium, 1 smallish)
type of donation(s): clothes, kitchen wares, toys, books, health & beauty items

Items sold: 11 via Half.com
sold items: DVDs (3), video games (1), CDs (1), books (6)
profit*:  $52.11


*Technically, this isn't "profit" since I probably paid more for the items in question -- but since I am relinquishing unwanted items, I count it as a profit. 

Tuesday, February 22, 2011

Spa Day at Home: Make Your Own Hair Conditioning Treatments

Any type of hair can benefit from a little TLC every now and again.  There are some great products available anywhere from specialty stores, to salons, to your local drugstore down the street.  For a truly customizable experience, you may also treat yourself to a little "spa day" in the comfort and privacy of your own home.  Making your own beauty treatments is fun and inexpensive; it's always satisfying to make concoctions for loveliness according to your own unique needs and specifications.

Here are just a few recipes for wonderful homemade hair conditioning masques.  Try a few, and enjoy the results!

Olive Oil & Egg Hair Masque:
This masque is a deep, intensive treatment for dry, damaged hair.  Some people swear by mayonnaise as a hair conditioner --this recipe gives you all the nourishing properties of this homespun beauty secret, without as much of the "ick" factor!  Take 1 egg yolk and beat it ferociously with a hand mixer or food processor.  Slowly drizzle in about a cup of light olive oil.  (Feel free to add a few drops of your favorite essential oil to this recipe, too!)  Once the last of the oil has been added and the mixture becomes creamy and thick, it's ready to use.  Slather your hair in this conditioning masque for about 20-30 minutes before shampooing as normal (you may need to shampoo twice).  

Nourishing Guacamole for Hair:
This one is easy, vegan, and works well for most hair types.  Take a very ripe avocado and mash it to bits with fork or blender.  Add the juice of half a lime, and you're ready to roll.  You can keep this on your hair anywhere from 15 minutes to an hour before shampooing.

Yummy Banana Hair Smoothie:
Another super-easy masque with only two ingredients!  Mash a banana with half a cup of yogurt (plain, "light," or even flavored), blend thoroughly, and apply to your hair for about 30 minutes.  Rinse and shampoo as usual.


Lemon Meringue Hair Treatment:

This one requires just a bit more effort, but it's impressive and fun, and will remind you of your favorite yummy dessert.  Beat 2 egg whites until they're extremely fluffy; if you need help "fluffing" the eggs, add a few dashes of cream of tartar, though either way, the treatment will be beneficial.  Once the desired consistency has been reached, fold in a big squirt of honey (maybe 1-2 teaspoons or so) and the juice of half a lemon.  Saturate your hair with this mixture for 15-30 minutes, and wash as usual.  Make sure you don't rinse this out with water that's too warm; you don't want to cook the egg!


For best results with these treatments, use a shower cap in conjunction with these treatments.  Use a hair treatment once each week for optimal results.  Be sure to refrigerate any unused masque.  The olive oil & egg "mayo" masque should last in the fridge for a couple of weeks, but the others should be used as soon as possible.

Photo credits:  Avocado pic by the awesome ingserban, banana smoothie fixin's picture by the creative & talented quinn.anya, and the yummy meringue photo was done by the amazing Sunset Sailor!  Thanks for sharing on Flickr, my friends! :)

Wednesday, February 2, 2011

January Decluttering Report

A Hap-hap-happy Groundhogs' Day to all, and a Blessed Candlemas as well!  Goodness, it's cold out there.  Let's hope that our little friend Punxsutawney Phil will see his shadow today.  I usually love winter, but all of the odd weather that we've been having lately is getting a bit old -- I never know if I need to wear a heavy cape outside, or just my trusty black Dickies hoodie.  Mother Nature had better make up her mind, already. :)


In the spirit of getting my shit together vis-a-vis all of the clutter in my house, I have decided that it'd be a great idea to keep track of the stuff I've been doing to declutter by way of my donations and selling old shit on half.com & eBay.  Thus, I present to you my new feature: the monthly decluttering report!


JANUARY'S PROGRESS:
~~~~~~~~~~~~~~~~~~~~
boxes donated: 4 (1 large, 2 medium, 1 smallish)
cause(s) helped: Big Brothers & Sisters of America
type of donation(s): clothes, kitchen wares, toys, books, health & beauty items

Items sold: 3 via Half.com
sold items: books (3)
profit*:  $15.15


NEXT PICKUP DATE:  TBA (probably last week of February, will be scheduling it this week)


YTD PROGRESS:
~~~~~~~~~~~~~~~~~~~~
boxes donated: 4 (1 large, 2 medium, 1 smallish)
type of donation(s): clothes, kitchen wares, toys, books, health & beauty items

Items sold: 3 via Half.com
sold items: books (3)
profit*:  $15.15


*I suppose that, technically, this isn't my "profit" since I probably paid more than $15.15 for the items in question -- but since I wouldn't have made anything back if I didn't decide to relinquish these items, I'm'a count it as a profit.  So there. ;)

Also, big thanks to Flickr's qmnonic for his fantastic groundhog picture, which fit into today's entry so perfectly!  (Well-timed nature shots like this don't happen every day, lemme tell ya!)  This is actually Punxsutawney Phil's Canadian cousin, I think, but he's got that whole "peeking out of the hole to check on his shadow" thing mastered to a tee! :)

Friday, January 28, 2011

Clean-Up Time

Fuzz and I don't typically make New Years' resolutions, per se, but since 2010 has brought so many changes to both of our lives, we've decided to stay on trend and continue making more changes  -- positive ones.  In the past few months, I have acquired a trash bag filled with undesireable objects for which I have no use -- a bunch of worn-out clothes, CDs of lame music, a coffee maker that was sitting inside a dirty mold-filled house -- and I've been meaning to get rid of these things for some time now.  I've also been in the process of purging other areas in the house to prepare for a major transition, so it seemed like a great idea to resolve to get rid of our extra shit.

Rather than do a full-on insane sweep of the house, I opted for an easier idea: We'll get rid of a few boxes each month, either until the end of the year or until our house is clean, whatever comes first.  Moving a heap of boxes is a hassle, though.  We've got a longstanding relationship with a number of non-profit organizations to whom we like to give extra money and items whenever we can.  Because our favorite donation organization, the Massachusetts Vietnam Veterans of America, doesn't do door-to-door pickup in our "new" local area, we opted for our other favorite charity, the Big Brother & Big Sister Foundation.  It turned out to be a fabulously successful undertaking... all we needed to do was fill out the form online, have our boxes on the porch for them on the day of the pickup, and Bob's your uncle -- the stuff's out of our lives, and ready to go into the lives of someone who wants them.  Best of all, it helps a wonderful organization to do great things!  Since the January pickup went over so well, I'm already thinking of what I want to donate next month.  I may just decide to tackle the ever-so-nasty Bedroom Closet O' Doom!

Here are a few tips to help you get started donating...

1.  The general rule of thumb is that if you haven't used an item within the past year, and you're not sure you'll be using it within the next year, get rid of it!

2.  Start small.  There's no need to purge every square inch of your living space right away; do it in small, manageable steps.  For example, choose a room -- or part of a room, such as getting all the drawers in one dresser -- and get that done first before moving onto another section of your space.

3.  As FlyLady says, "Never take out more than you can put back in one hour."  I know it's exciting to get things purged, but take your time and do it right.

4.  Schedule your pick-up or drop-off day well in advance so that you can work on the mess in small, manageable bits.  Even if your house looks like an episode of Hoarders exploded all over it, an emergency cleaning session is just gonna stress you out.  Take it slow and make the process as easy and stress-free as possible.  You did not accumulate the clutter in the space of one day, so you need not feel pressured to get it immaculate in one day, either.

5.  Don't let guilt or regrets weigh you down.  Just because you got something for free and/or got a good deal on it (or, worse yet, spent WAY too much on it) doesn't make you obligated to keep it.  Likewise with presents that just aren't "you."  If you don't love it, let it go -- maybe there's someone out there who needs and wants it.  Give those things a good home where they'll be appreciated and loved.

6.  Donate and recycle as much as you can.  It's good for the environment, the economy, and the soul. 

7.  Don't feel the need to put it off because you "haven't gotten it all done yet."  Do what you can, you can always schedule another pick-up, or find local thrift shops and make dropping things off a regular habit!


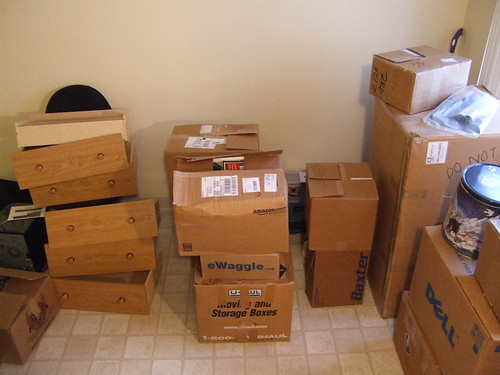
...And, in the interest of recycling and reusing, I have found these lovely pics on Flickr.  Thanks to the talented ed.ward for his awesome "messy room" photo, and the whimsical joebeone for the "moving boxes" pic!  I'm thrilled to give them credit in accordance with Creative Commons.  I do try to take my own pics when I can remember to do so, but I appreciate the sharing spirit of my fellow Flickr users.  Thanks!
Related Posts Plugin for WordPress, Blogger...