Showing posts with label with meat. Show all posts

Wednesday, August 28, 2013

Chicken Carcass Soup

Last night, I had a delightful rotisserie chicken! (Yay!) But, it was overcooked. (Boo!) It still tasted pretty good (yay!), but quite a bit of it was inedible due to the scorched parts (boo!). I decided to make some bean stew later this week (a la "Recipe for a Snowy Day")... Which is not only a great way to use up those blackened bones and dried-up meat and shrivelly chicken skin, but also a fab way to get the nasties out of the fridge as well!!

I started by picking all of the usable meat off the bones -- I'll eat that for dinner tonight -- and threw all the rest of the carcass into my trusty crockpot. Some of you might be aghast that I didn't toss that tasty browned skin -- but I never do! I always let the skin simmer with my broth, and after everything is strained and cooled, I just skim the fat from the top. It couldn't be easier, and the broth turns out virtually fat-free this way.  And even the littlest bit of extra flavor helps.

I also added the woody stalk pieces to some asparagus that's been staring me in the face a little too hard... (Because, again, it's all getting strained... Why not add what you can't eat?)

... As well as the green leafy ass-end of my beautiful cauliflower.  (Not pictured: the bug I found clinging onto a floret for dear life!)

Then, I grabbed the ass-end of my celery and chopped it up too.  By the way... You know those green and yellow leaves that you toss whenever you chop celery? Shame on you! ;)  I always use mine in broths, soups, and stews for extra flavor. You should try it!

Last (but certainly not least), I gutted the nasty parts out of a sweet potato before coarsely chopping it and adding it to the mix.

Once the veggies were put into the crockpot with my carcass, I added some liquid.  Add whatever makes you happy -- chicken or veggie broth that you already have, water, booze, anything.  I had frozen a couple of cups of "onion broth" which came from my day-long onion simmering session a few weeks back... It will make a tasty addition for sure!  Tonight, I will soak my dry Lima beans and tomorrow we'll have a yummy, healthy, homemade dinner.

That's all for now. Happy broth-making! :)


Saturday, December 15, 2012

Picadillo Time!

Well, it's been a few months... and I've done a few things that I've wanted to post sooooo badly!  But for some reason, I've been kind of lethargic about that stuff.  I think the relocation just hit me harder than I realized it would!

But, after weeks of being like "Oh, this would be such a fun thing to post on PGS!" today I was like, "Screw this, even my humble dinner recipe HAS to be posted!"  So today, since a bad cold has been kicking my social circle in the ass all week long, my friend Fluffy and I decided to make some yummy spicy picadillo for dinner.  Fluffy and I shared the picture-taking duties.  Here's my recipe, and no, it's not really authentic at all.  But it IS inexpensive, forgiving, great for when you have (or need) lots of leftovers, and aside from the ridiculous amount of sodium, can be quite nourishing and yummy.

INGREDIENTS:

Solids:
* 1 lb ground beef (preferably quite lean, 'cause draining it is a pain in the ass)
* 1 lb ground turkey
* 1 10-oz package of Morningstar Farms "Grillers" crumbles (or your fave equivalent)
* 2 huge-ass chopped red, white, or yellow onions
* 1 red and/ or green bell pepper (use half of each, or one whole one of each if you love peppers... you could even go crazy and add a couple of jalapenos or banana peppers)
* 1/2 cup diced celery with chopped-up leaves for flavor
* a few tablespoons of capers
* 1 1/2 whole kosher dill pickle, or 1/2 cup olive style of your choice (I want olives, but Abil {A Boy I Like} has a psychic allergy to them, so pickles it is!)

Liquids:
* 1/2 cup wine; marsala is recommended
* EITHER the small can of tomato paste (how many ounces is that? 6?) or a 14-ounce can of chopped tomatoes
* water
* A splash of red wine vinegar or pickle juice -- hell, use both like I do!

Spices:
* 1/2 teaspoon crushed dried rosemary
* 1 tablespoon dried garlic or garlic powder (use to taste; I like a lot)
* anywhere between 1 and 5 bay leaves; use your favorite number.
* a big pinch of allspice & a big pinch of clove (optional but yummy)
* 1 1/2 tablespoons cumin
* 1 tablespoon paprika
* 1/2 teaspoon black pepper
* 1/2 teaspoon chili powder
* 1 teaspoon hot red pepper flakes (use to taste)
* 1/2 teaspoon oregano, thyme, or basil
* Optional: a few drops (or gallons) of Frank's hot sauce!
* Also optional:  A packet of Sazón Goya, for that delicious hit of MSG.  I would avoid adding any additional salt, as the pickled stuff and cooking wine has plenty.

Gases:
Not 'til later! ;)


Step 1.  Chop that onion and celery, get it sweating over the stove!  Use some olive oil if you have it, or just a bit of cooking spray.  Medium or low heat should do it.  Cook until the onion is see-through-ish and/or brown. 

Step 2.  Dice your peppers, process your pickles (either digital or analog methods will work fine), and get your spices ready while you wait for the onions to be translucent. 


Step 3.  Toss all that shit -- your peppers, your spices (except the Goya, the bay leaves, and the Frank's) -- into the pot!  It's better to put your spices in while the veggies are cooking so that they get coated with delicious seasonings right away. 

Step 4.  Add your tomatoes and/or paste, swirl it around until it's evenly mixed.

Step 5.  Add meat, breaking it up into luscious chunks.  Turn up the heat if you need to.  If you want a vegan recipe for picadillo, you can always substitute your favorite meat analogue for the turkey and beef as well; nothing else in this recipe is animal-based.  I have tried it both ways, and it's awesome no matter what protein you like.

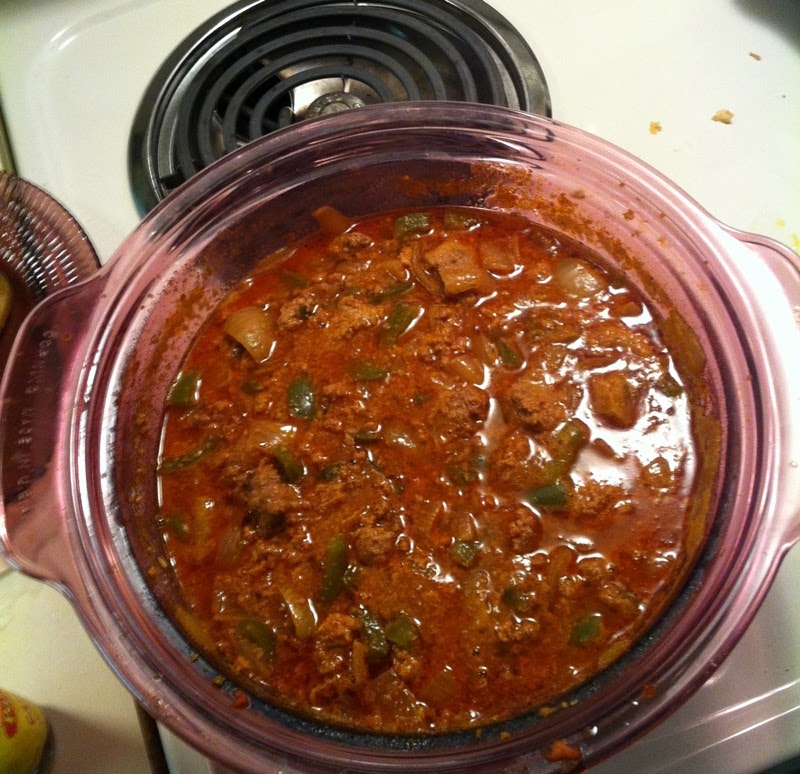
Step 6.  Here is where you add everything else: the wine, the vinegar, the "Grillers," capers, pickle, bay leaves, Sazón if you choose to use it, and just a bit of hot sauce -- you can adjust the heat later.  Stir everything up until it is mixed well, then add plenty of water.  Ideally, you want the entire mess to be completely covered and then some.  (This picture was taken after about 45 minutes of simmering, so keep that in mind.)  At this point, get the heat to medium-high, and then turn it to low after it has begun to boil.  Stir it now and again as it simmers, making extra sure to scrape the crap at the bottom of the pot so it doesn't stick and burn.  No one likes a ruined picadillo, except maybe your pet rats, but they really shouldn't be eating onions or garlic.

Here it is, bubbling frantically on the back burner!  It's almost done after about an hour...  Keep stirring and waiting.  I bet your kitchen smells awesome right about now!  Reminisce with your friends about how, years ago, this would be right around the time you'd be getting ready to go out clubbing... and then you eventually had other things consuming you, like arthritic hips and finding ways to pay for your Geritol addiction.  Ahh, memories!

And now, approximately an hour and a half after adding the water and crying over your lost youth, the picadillo has come to the perfect consistency: The liquid has reduced beautifully and everything has come together perfectly, so now it's almost the consistency of chili or a dense meat sauce.  There will still be some yummy liquid floating around in there, but it's fine and delicious.


 DONE!  Serve over rice and enjoy it!  (Also, marvel over how your new iPhone makes everything look 109482983958 times nicer than the crap-ass old cell you used to take kitchen pics with... wow!)

Monday, April 2, 2012

A Bloody Good Dinner

A couple of weeks ago, I celebrated St. Patrick's Day with a small dinner party consisting of myself, a boy that I like, and 5 really cool friends -- or 7, if you count the babies!  The fare was authentic Irish food (and Irish-American dishes) including shepherd's pie with poundies, corned beef and cabbage, barley with peas and herbs, potato candy, and 2 savory puddings, black and white.  I also made potato candy and a chocolate-orange trifle (recipes to follow in another entry).

I'll give you my white pudding recipe next time, but in this entry I want to explain my process for making black pudding.  For those of you who have never tried it, you should DEFINITELY give it a shot.  And if you've eaten it but never made your own, I'd recommend trying that too; it's a really visceral experience.  (Ha, ha.)

While blood is actually considered tissue in the body, as well as offal in butchering terms, I'm still categorizing this entry under "organs" since it's often sold and processed with the organ meat anyway.

For years and years, I've wanted to make black pudding.  But it can be tough to find a good blood provider.  I have seen pork blood for sale at the local Asian grocery, but I've always been reluctant to purchase it -- their meat always looked kind of old and sad, unlike their very fresh fish department.  However, a few years ago, I was given the phone number of Blood Farm, which is local and has a slaughterhouse on premises.  (It is a farm which is owned and operated by the Blood family -- by coincidence, it's also a place where one can buy blood and guts!)  Unfortunately, we missed pig slaughtering day, so no dice for pork blood.  However, they were slaughtering cows the day before we called, so I had my man order a quart of beef blood, with a bit of salt in it to keep it from congealing.

The next day, he came back from Blood Farm with a large plastic bag, which was tied with a thin rope and filled with an indeterminate amount of cow blood.  It was still warm!  What a grisly sight indeed... I almost couldn't process the blood.  (I did say ALMOST!)  I cut the rope, and ever-so-carefully poured the blood into a plastic container.  Turns out that for six dollars, I received nearly three-quarters of a gallon of delicious beef blood.  Mmm mmm, good!

After perusing a number of recipes online, I pretty much made up my own recipe, using this black pudding recipe from Phebotomist as a reference for cook times and blood-to-filler proportions.

I mixed my blood together with milk, bread, barley, a bit of flour, some butter (instead of suet), and lots of yummy chopped garlic with other seasonings.  Then I stirred everything together in order to mix it as thoroughly as possible.  All of the black pudding recipes that I found online called for oats, oat flour, or "fine oatmeal", but I had used up all of my oats on the white pudding.  So, I decided to improvise and use a few cups of Cheerios as a substitute. Breakfast of champions, my friends!

Then, the pot of bloody Cheerios was whisked away by my man, who put the whole thing onto the stove as he stirred it over a medium flame.  It was supposed to darken, but after a few minutes of the two of us looking back and forth at each other, going "WTF?" over a blood-red Cheerio stew, the mixture began to bubble and foam up a bit.  Then out of nowhere, up came a huge black bubble!  After some vigorous stirring, the rest of the mixture followed suit.  He then poured the mixture into one of our large casserole dishes -- I couldn't believe how much this recipe yielded, by the way -- and amazingly enough, many of the Cheerios remained intact!  In fact, the whole mixture looked quite a lot like brownies with a passel of Cheerios gaily festooning it here and there. 

The next step was to let the mixture sit in the fridge for awhile, and then to cut it into slices and fry it.  I thought that the blood pudding tasted fantastic, sweet and meaty and buttery.  In fact, it reminded me quite a bit of "the orange stuff in stuffed derma" (sorry, can't remember what it's called).  But it was far too greasy for me to enjoy it quite as much as I wish I had.  I don't think that suet would have melted as quickly as butter had, during the cooking stage.  However, next time I make this (and that day won't be toooo far off!), I think I'll just omit the butter/suet component during the first act.  It was also very soft, which I didn't really mind, but stuffing it in casing will make for a much yummier eating experience next time.  But all in all, I'd call this attempt a success!

I already have another small batch of ideas for cooking with blood in the future, so watch this space for the dirty details. :)

Saturday, March 3, 2012

Our Elegant Spa Party


Some friends and I have recently begun to host a monthly get-together where we all use our talents for the enjoyment of our guests (and their friends).  Between us, we have an asthetician who does waxing and other spa treatments, a hair stylist who does awesome cutting, a professional masseuse who's always very in demand, and a professional psychic (that's me!).  Since the spa and hair specialists are next door neighbors, we use their apartments and just keep the door open between the two of them.


I haven't made a lot of money at this gig, but it sure has been fun!  Since two of the ladies are hosting (and have to get everything ready), I've been given the honorary chef's hat.  Last month, I made stuffed mushrooms and a veggie sushi platter (which, unfortunately, I got nooooo good pictures of!), along with some luscious fruit skewers of strawberry, papaya, and kiwi.  But this month I really wanted to do something elegant.

My savory dish was mini-quiche in two flavors: Lorraine and Florentine.  They were very easy to do, and lent a very "elegant teatime" vibe to my vintage goodies tray.  (I used a Bisquick recipe, though substituted Jiffy mix; worked great!)  For the fruit portion of the spread, I decided to make parfaits with a fruit dip which was once said to "drive everyone mad with lust!"  I ordered plastic wine cups from Oriental Trading Company and they made wonderful little parfait glasses.

We also had some simple cheese and crackers -- some nice pepper jack and yummy Babybels paired with the most scrumptious rosemary crackers I've ever tasted.  Carr's rosemary crackers are amazing; if you haven't had 'em yet -- definitely pick some up the next time you get a cracker craving!  Another party guest brought some pineapple platters featuring a stunning array of fresh tasty crudites with two kinds of hummus.  My favorite is the garlic lover's, YUM! :)

All in all, it was a really fun afternoon!  If you live in the Boston area and want to be invited, feel free to let me know.  Our website is at http://www.DawnSoul.com and we always have room for another friend. :)


Friday, February 3, 2012

Pink Manicotti


I'm starting to realize that 90% of the recipes I post on PGS are of the "evil" variety, i.e. they are tremendously unhealthy and are rarely cooked and consumed by me.  However, if I posted recipes for what I ate as my staples, you'd be pretty bored.  Plus, I'm pretty sure my readers already know how to put cottage cheese in a bowl, grab a baked chicken leg out of the fridge, wash a Granny Smith apple, put some carrots on a plate, or how to place a pool salsa attractively next to a pile of lime-flavored tortilla chips.

Half the fun of making an evil recipe is announcing it to the world.  While this manicotti recipe isn't especially bad on its own, the entire stick of butter gives it some evil cred, much like the sauce in Nicolas Sparks' True Believer.  I have never read a word that he's written (nor have I seen any of the movies based on his books -- no offense, but they look kinda boring), though a friend of mine did mention an interest in trying "the tomato sauce from True Believer."  This is what I came up with as kind of a fancier "pink" version.  I love pink sauce, but real pink sauce with tomato and cream, as opposed to "a jar of red spaghetti sauce plus a jar of alfredo sauce."You can make this recipe with or without the stick of butter.

Pink Manicotti
A classic cheese-filled manicotti in a very rich pink wine sauce with customizable spices.  This recipe makes 2 pans of pink manicotti!

INGREDIENTS:
1 standard-sized box of manicotti pasta
2 28-ounce cans of Tuttorosso ground tomatoes with basil (you can use "blank" tomatoes and add your own basil, but I love Tuttorosso tomatoes!)
1 stick of butter
1/2 brick of Neufchatel cheese (4 ounces)
1/4 cup of red wine
8 ounces shredded mozarella cheese
32 oz part-skim ricotta cheese
seasonings: basil, oregano, thyme, garlic, Montreal seasoning.
1 big yellow onion or  a bunch of green onions, chopped finely
OPTIONAL: 1 pound of ground turkey

Place the tomatoes, butter, onions and some herbs into the crockpot -- I like to season mine with more basil, oregano, thyme, rosemary and garlic.  If you aren't sure how much you like, just do a pinch or two of each. (Mine varies depending on a multitude of factors.)  Let the tomato mixture cook on High for about 3 hours.  Add the neufchatel and wine, then let it melt while you boil the water for the pasta.  If you're cooking ground turkey to add to your sauce, this would be a good time to brown the meat.

Cook manicotti according to al dente directions, then shock the pasta with cold water to keep it from cooking any further.  Stir your sauce, coat your baking dishes with cooking spray, and then spoon a bit of the sauce into the bottom of each dish.  Preheat your oven to 350.

Add some seasoning to your ricotta cheese (I keep it simple; Montreal and some basil, though sometimes I crack in an egg or some spinach), then fill the manicotti with it and add manicottis to baking dishes.  Leftover ricotta can be spooned over the top of the manicotti.  Browned turkey can be sprinkled randomly over the dishes.

Stir your sauce thoroughly, making sure that the neufchatel and butter are well blended.  Taste and adjust seasonings if you need to, then pour the sauce over each baking dish.  Top each dish with mozzarella cheese, and bake in the oven (uncovered) until the cheese gets melted and things start to brown -- it usually takes about 25 minutes.  (Conversely, you can cover the dishes and put them the fridge; bake covered for 40 minutes, then uncover and give it another 10 minutes to brown that cheese.)

Let it stand for a bit, then enjoy!  This is an extremely rich, decadent sauce; a nice green salad on the side can complement that.

Monday, January 16, 2012

Q: What Do Disco Bandits Eat? A: Disco Fries!


Ordinarily, I try to eat healthy. Honest, I do! Recently I joined Bat Fit 2012, so my next few recipes should be much healthier than this one.

One of the things that I make during hectic holiday seasons is Disco Fries, which I did a little while before my phone died. It is a spectacularly unhealthy dish which I make only rarely, but wonderfully easy and tasty. This is my thrice-yearly guilty pleasure -- especially comforting when the weather's cold, and our day has been busy and tiresome. I usually have the Disco accoutrements on hand, all we need to do is pick up a big order of our favorite spicy fries.

And, before you ask... no, I'm not exactly sure where the term "Disco Fries" originated.  All I really know is that while there are various versions of cheese fries in America and, indeed, the world, fries which are topped in a cheese and brown gravy are known as Disco Fries in the NYC area.  One thing I do know is that if you're getting ready to don some sparkly bell-bottoms and bust a move at your favorite discotheque, you'll need lots of dairy and carbs to keep your booty shaking all night long!

INGREDIENTS:
spicy fries -- a serving for as many people as you're feeding!
shredded cheddar cheese
brown gravy (make your own, buy it, steal it... whatevz!)

You can buy some fries at your favorite fryery if you're feeling lazy and/or want that great factory-fresh taste.  Even McDonald's would be OK, but if you can find or make spicy fries, it'll be even better.  After they have been purchased or prepared, place them onto individual plates, and spoon some brown gravy over the fries.  Then sprinkle some cheese over the whole thing.

I've heard that some people melt the cheese in the broiler in the oven, but I just microwave mine for about a minute; I like my cheese a bit on the firm side.  The trick is to keep your little eyes on it, so that it doesn't burn or get nasty.  Just let the cheese melt and the gravy bubble, while feasting your eyes on the majesty of Disco Fries.  Then remove from your heat source, let it cool for a few minutes, and enjoy!

I will leave you now with the Disco Fries song by Parry Gripp, to prepare you for this culinary odyssey.


Tuesday, December 27, 2011

Love, Peace, & Chicken Legs

I'm not exactly sure how or why, but I recently came across this blog entry from Dine & Dish about baked chicken legs.  Somehow, the author has become obsessed with them to the point where she wants to eat them every day!

I showed Fuzz this article, and he was like "WTF is so special about baked chicken legs?"  And it's true; the ingredients are pretty simple -- just salt and pepper, a soupçon of olive oil, and the legs.  You basically pop them in the oven, and Bob's your uncle, baked chicken legs!  The commenters seemed to be singing the praises of these simple leggies to high heaven.  They were so fanatical about the glory and wonderousness that is baked chicken legs, that I had to try it and figure out what the deal was.  We made a half-batch for dinner soon afterward.

Well, I must say, dinner was rather unimpressive that night.  "Um, yeah, it's just chicken," Fuzz said, picking at his legs.  I wasn't quite as snobby about it as he was, and enjoyed it for what it was -- just some simple chicken, salt and pepper, a tiny bit of Frank's, no big whoop.  We packed up the excess legs, and within a day or two, I was requesting some of the leftovers for lunch and/or dinner.  Much to Fuzz's surprise, I enjoyed the hell outta those leftovers!

For the record, I don't consider these baked chicken legs to be quite as orgasmic as the enthusiastic commenters in each blog.  However, these sure were easy.  And the leftovers were just what a mobility-challenged gal like me needs on a high-pain-score day: plentiful, great without heating, and highly "grabbable."  What's more, a medium-sized chicken leg, sans frying or crazy sauces and condiments, is approximately about 70 calories or so (80-something if you absolutely have to eat the chicken skin).  So, even though I wouldn't call them God's gift to chicken legs, I would absolutely say that they're very tasty in their own right, convenient, and quite healthy too.  I'll be experimenting with some more seasoning techniques in the future, and will let you know how it goes!

P.S.  Apologies for the lame-ass clip art -- it was either clip art or nothing, and I didn't want to break my own anti-perfection rule!  Turns out that my Motorola Cliq has officially bitten the dust!  Fortunately, my replacement phone has been ordered, and should be arriving any day now.  So I'll be going back to some more regular posting in the near future, I'm sure. :)

Thursday, September 30, 2010

Holy Shit! More on a Stick!

 
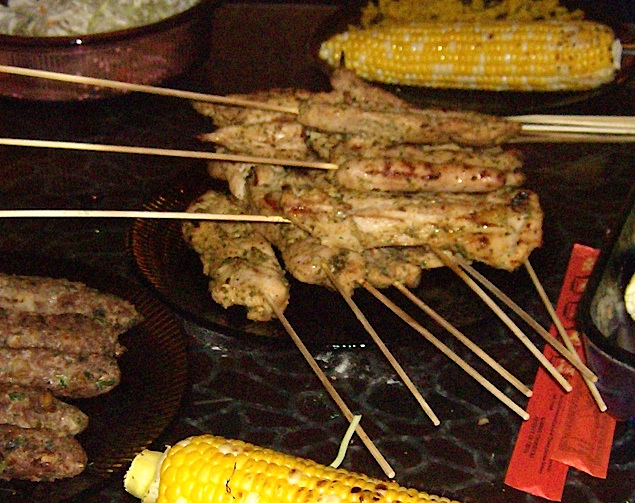
Turkey is another yummy thing to cook on skewers.  By marinating strips of meat in a spicy marinade, you can turn mild-tasting turkey into a delicious flavor-packed meal that's healthy, convenient, and impressive.  These are delicious right off the grill, or even chilled the next day.  


TURKEY CHOOCHACHEECHACHOO FOR A CROWD OF SCREAMING FANS!

INGREDIENTS:
1 entire turkey breast
1 package of McCormick "Zesty Herb" marinade mix
2 teaspoons of curry powder
1 teaspoon of turmeric
1/2 cup white vinegar
1 teaspoon of dried garlic OR 4 cloves of fresh chopped garlic
Hot sauce to taste (I insist you use Frank's; a goodly amount, but not so much that people think they are eating buffalo choochacheechachoo [though now that I think about it, that sounds pretty good too]!)


EQUIPMENT:
skewers
knife
1 gallon plastic bag

First, take the skin off of your turkey breast.  Then cut all of the delicious boob meat off of your turkey, trying to keep each half as intact as you can.   (You can save the bones and all the meat sticking onto those hard-to-reach places for soup stock; just toss it in the crockpot with a bit of veggies and your choice of spices, add some water, and... Bob's your uncle!  Yummy stock/broth in about 3-4 hours!)

Slice the turkey breast meat into strips and place into the plastic bag.  Add all the other ingredients and marinate 8 hours or overnight.  When it's time to cook the turkey, place the strips onto sticks and grill for about 20 minutes on a low heat, or until the turkey is done.  Sometimes I finish these off with a light glaze of apricot preserves and curry powder so they'll look pretty on a plate, but if that's not your thing, this is especially tasty with Awesome Sauce.


Tuesday, August 24, 2010

I Heart Shit On a Stick

According to serveral articles I've been reading (here, here, and here), America's least favorite food is liver. I'll bet you didn't need a poll to know that, though.


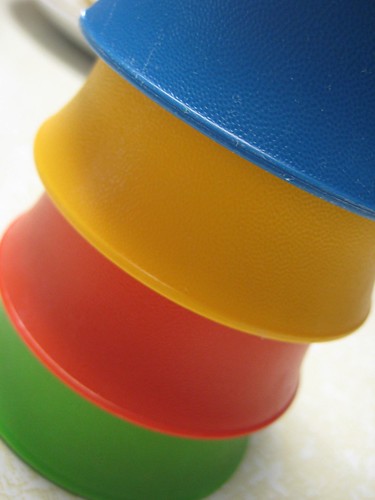
I can still remember the first time I tried liver.  I was two or three, it was a fairly cloudy day, and I wore a dark blue long-sleeve shirt and possibly an eye patch.  My brother and I were eating our dinner in the living room, sitting on the floor in front of the TV, with our plates on the coffee table.  My mother gave us our dinner plates which contained liver sauteed with some onions, and green beans on the side.  When my brother tried it, he said, "Ew, the liver's yucky!  I'm not gonna eat it!" He ate all his beans, and drank all his milk out of his little blue Tupperware cup that everyone had in the 1970s (the red one was mine), but he left every bit of that liver on his plate -- including the piece he'd tried and spit back onto the plate.  I had a few green beans, contemplating my brother's statement of what had been set before us.  The only food that I didn't like was bananas, and since a piece of meat couldn't possibly taste like one, I wondered what the hell was so bad about it?  I'm glad I didn't cave to peer pressure -- it was delicious.  I can still remember the texture of the beautifully caramelized outer layer, which my mother had achieved by dredging it with flour before sauteeing it to a perfect degree of doneness... the soft-but-spongey texture as I chewed it... that pure, clean (?!) organ-y taste mingling with the onions and just a hint of butter.   I also remember that my poor brother was told to eat a few more bites of liver before he was given his dessert -- vanilla pudding, fresh off the stovetop.  I consumed the contents of my plate with relish, both mystified and full of pity for my brother, who just didn't seem to get how great the liver was.  Two decades later, liver remains one of my favorite foods.  (My own recipe isn't bad, but it's not even close to as good as my mom's.)


I can see why people don't like liver, though.  It has a strong taste.  Its purpose is to detoxify the body by breaking town toxins, hormones, and insulin; it is the storage center for many different types of vitamins and minerals, such as vitamin D, iron, and copper -- it's a very busy organ, so naturally it's going to be strong-tasting and sometimes a bit tough in texture.  I have microcytic anemia, and have struggled to maintain my iron levels for just about as long as I can remember; liver showed up at my house for dinner pretty frequently when I was younger.  More often, during times of the month when my energy was especially depleted (like a visit from Aunt Flo), my mom would get some thick bloody steaks; we'd fire them up and consume them with plenty of salt, pepper, and gusto.  Most of the time, these really did make me feel better.


It is for these reasons that I didn't even hesitate to try my first helping of beef heart many years ago -- I'm an adventurous eater, always itching to try something new. True, the idea of eating a heart can seem pretty gross to some people, but an open mind helps a lot. I'd eaten chicken and turkey hearts before, but always after they'd been boiled to death as a flavoring agent for stock or gravy. I had expected the red, bloody heart to taste a lot like liver, but in fact, it's nothing like liver! The heart does function as a major organ, but it's actually a muscle. Beef heart tastes a lot like really good steak, fibrous but surprisingly juicy, with a wonderfully satisfying texture that is substantial but not too tough. Preparing the heart can take some work -- there is often a layer of hard fat on top, and lots of leathery "silver skin" on the outside of the heart, as well as some connective tissue on the chambers underneath -- but once you get through with trimming those away, you are left with a delicious piece of meat with outstanding flavor and texture.


For years, on the rare occasions that Fuzzband would see hearts at the store, he'd snap them right up. Recently, he had the brilliant idea to just ask the meat guy at our local market. (I think it was at Stop & Shop, but it could have been Market Basket, for those of you in New England!) You don't need to go to a fancy food shop to find them. Just go to your meat department and ask the guy or gal in charge; they'll be happy to hook you up. Beef heart can occasionally be found among the usual offerings of steaks and roasts, but not all stores will order them unless they're getting them for a specific reason. The meat guy told Fuzzband that we didn't need to order the entire case, but any of the hearts that we didn't take would be offered in the store to other customers. Because of the low demand for beef heart, Fuzzband agreed to take the entire order. So we had about 12 pounds (8 tasty hearts) for me to enjoy.


The hearts were packaged by "Rumba Foods," and vacuum-sealed so there was plenty of time to enjoy them once they had arrived. My husband was curious about other organ meats that Rumba offered (since he also keeps a lookout for things like kidneys and oxtails), and was excited to find a recipe section featuring a yummy-looking idea for cooking the hearts when simple skillet cooking proved to be boring for me.

He couldn't remember the name of the dish, but he described it to me: It was pieces of heart, trimmed, chopped into pieces, and marinated in a spicy brine; then the meat is placed of skewers and grilled. The name, he said, was an unusual Spanish word. "It sounded like... some word I'd never heard... like... choochacheechachoo... or something like that."

The real name for this dish is Anticuchos, which is a Peruvian treat made of any type of meat (but most often beef heart) which has been marinated and skewered. You can find the original recipe for Anticuchos at the Rumba website, along with all kinds of other interesting ideas. (It sure would save money if I ordered some tripe and learned to make Mondongo at home! YUM!)  There's another recipe for it on Wikibooks, but it seems a little more hot-centric than spicy flavor-centric.

Because my own recipe is an Anticuchos variant, and while more or less true to the original, I call my version Choochacheechachoo after Fuzzband's made-up memory lapse word.  It's a whole lot of fun to say, too, especially if you whisper it really fast.  Choochacheechachoo!  Try it! :)

CHOOCHACHEECHACHOO

INGREDIENTS:
1-2 beef hearts (use 2 if they're small; you need about 2.5-3 pounds)
A handful of minced cilantro (about 1/4 cup -- see my notes at the end)
2T ketchup
3T cumin
2T dried garlic pieces (or 4-5 cloves of minced fresh garlic)
1 tsp black pepper
1/4-1/2 tsp hot sauce (I like Frank's; this is optional, and you can use more if you want more heat)
white vinegar (anywhere between 1/2 and 1 cup, depending on how much heart you have.)

EQUIPMENT:
sharp knife
cutting board or plates
one-gallon freezer bag
a grill
about a dozen or so skewers


After you've removed the hard fatty lumps, the connective guts, and the "silver skin" from the outside of the heart, you'll have a big yummy piece of meat to work with.  All of the fat is on the outside of the heart, and once it's gone, what remains is lean and delicious!  Slice the meat into strips; I can usually get between six and eight strips out of one heart.  I used two hearts for this batch, but once I had a 3-pounder that made over a dozen strips! 


Put the strips in your plastic bag.  Add the remaining ingredients.  Close the bag, making sure to get out as much air as possible, and massage the seasonings into the meat.  Put in the fridge and marinate a minimum of 12 hours.  (I have marinated my choochacheechachoo for as long as 2 days, but overnight is best IMHO.)  The vinegar will tenderize the meat; the garlic and cilantro will blend together and create a fantastic flavor.)

When you're ready to grill, put the meat strips on skewers.  Cook them on a hot grill for about 5 minutes (a couple of minutes per side) until they're cooked to your doneness preference.  Set aside for 10 minutes or so after grilling to let the meat rest.  Each piece of choochacheechachoo should contain around 2 ounces of meat, so this recipe should serve about 5 or 6 people if everyone has 2 or 3 pieces.  It's also a fun and satisfying party appetizer for a crowd, too!  Leftovers will last several days in the fridge, and are awesome hot or cold.  I don't even bother reheating them the next day; choochacheechachoo isn't greasy since all the fat has been trimmed!

My camera ran out of batteries before I got a good picture of the final product, but my next batch (below) didn't have nearly as much cilantro as the one that was prepared above.  It was still tasty, though I think cilantro and tons of garlic are necessary for the best flavor!


NOTES:  I like having the meat cut into strips rather than chunks; it's juicier that way, plus it feels so deliciously primal to yank the meat from the stick with my teeth!  If some of your strips are a little short, it's definitely OK to combine them for a more uniform portion size.  And if you hate cilantro, use fresh parsley in its place.  It's not exactly the same, but something green in the marinade will make for a tastier choochacheechachoo.


Tuesday, October 20, 2009

Recipe For a Snowy Day


Winter will officially begin this week, and today was the first major snow that we’ve had here in New England. As usual, my husband will be getting home pretty late . He does an hour-long commute both to and from work each day, so rather than sit in snowy traffic for 4 hours on a snowy Friday night, he’s going to stay in the office for a couple of extra hours until the traffic dies down.

This past week, we had a power outage that left us in the dark for 4 days. Needless to say, all the crap in my fridge and freezer were lost — and that includes my precious condiment collection! We had our weekly groceries delivered last night, though: mostly a lot of fresh meat and veggies. Eating out of cans for 4 days in a row can be pretty draining to the soul!

Since the weather outside is pretty brutal today, I’ve decided that I really want to make something warm and comforting for dinner tonight. And nothing accomplishes that feeling better than a big bowl of homemade soup — except, of course, if it’s the sort of soup that can be made by throwing a pile of stuff into the crockpot and forgetting about it.

CROCKPOT VEGGIE-BEEF SOUP

1 lb. London broil

1 15-ounce can of your favorite type of beans, drained (and hopefully rinsed)

2 cups vegetable juice cocktail (V8)

1/2 cup pineapple juice*

1/3 cup low-sodium soy sauce

2-4 cups of water (some of the veggies will provide moisture too)

1/2-1 cup chopped carrot

1/2-1 cup chopped celery

1 large chopped onion

good-sized pinch of dried rosemary (maybe 1/2 tsp or so; crumble it up between your fingers as you add it, unless you like big blobs of it everywhere.)

small pinch of dried basil (1/4 tsp or so)

2 bay leaves

Salt and pepper to taste


DIRECTIONS:

Chop up all the veggies and place them in the crockpot; you can choose to cut the meat now, or pull it apart once it’s cooked. Add the other ingredients into the crock pot and cook on High for 4 hours, or Low for 8 hours. (Add the beans at the beginning if you want them soft and falling apart, or at the end if you like yours to be more firm.) I’d recommend using salt once this soup has been served; soy sauce and V8 have quite a bit of sodium, and you may find you don’t really need it.

To make this a vegetarian meal, simply omit the London broil and add another 1-2 cans of beans (mix and match whatever you like).

I’ve added all kinds of other vegetables to this soup, but the ingredients above are the basic building blocks. Peppers, zucchini, mushrooms, and fennel are all delicious in this recipe.
Related Posts Plugin for WordPress, Blogger...