Showing posts with label reincarnation. Show all posts

Wednesday, August 28, 2013

Chicken Carcass Soup

Last night, I had a delightful rotisserie chicken! (Yay!) But, it was overcooked. (Boo!) It still tasted pretty good (yay!), but quite a bit of it was inedible due to the scorched parts (boo!). I decided to make some bean stew later this week (a la "Recipe for a Snowy Day")... Which is not only a great way to use up those blackened bones and dried-up meat and shrivelly chicken skin, but also a fab way to get the nasties out of the fridge as well!!

I started by picking all of the usable meat off the bones -- I'll eat that for dinner tonight -- and threw all the rest of the carcass into my trusty crockpot. Some of you might be aghast that I didn't toss that tasty browned skin -- but I never do! I always let the skin simmer with my broth, and after everything is strained and cooled, I just skim the fat from the top. It couldn't be easier, and the broth turns out virtually fat-free this way.  And even the littlest bit of extra flavor helps.

I also added the woody stalk pieces to some asparagus that's been staring me in the face a little too hard... (Because, again, it's all getting strained... Why not add what you can't eat?)

... As well as the green leafy ass-end of my beautiful cauliflower.  (Not pictured: the bug I found clinging onto a floret for dear life!)

Then, I grabbed the ass-end of my celery and chopped it up too.  By the way... You know those green and yellow leaves that you toss whenever you chop celery? Shame on you! ;)  I always use mine in broths, soups, and stews for extra flavor. You should try it!

Last (but certainly not least), I gutted the nasty parts out of a sweet potato before coarsely chopping it and adding it to the mix.

Once the veggies were put into the crockpot with my carcass, I added some liquid.  Add whatever makes you happy -- chicken or veggie broth that you already have, water, booze, anything.  I had frozen a couple of cups of "onion broth" which came from my day-long onion simmering session a few weeks back... It will make a tasty addition for sure!  Tonight, I will soak my dry Lima beans and tomorrow we'll have a yummy, healthy, homemade dinner.

That's all for now. Happy broth-making! :)


Saturday, August 27, 2011

Easiest Candle Making Technique Ever!

I love, love, love making candles!  It's one of the funnest and easiest crafts that I know of.  I mean, how can you go wrong?  Just melt a bit of candle wax, position your wick, add whatever colors or scents you like (crayons and essential oils or even perfume will work just fine), pour the whole thing together, and wait 'til it's firm.  I've been making my own candles since the 1990s and just love the entire process.  It makes me feel so creative and clever to use up my leftover waxes this way!  I also get the added satisfaction of knowing that my candle is unique; no one has quite the same color or scent that I do!

That said, pouring candles can be a real pain in the ass if you don't get it right.  The wax can form ugly lumps and bumps, you can find bubbles inside that compromise the burning smoothness, and sometimes the best-laid shapes will go awry.  And long, skinny candles -- well, forget pouring those!  Dipping takes too long (though admittedly, I have not tried it very thoroughly: maybe I'll do it sometime).

If you're a first-timer or you're in the market for an easy candle project, you can buy yourself some rolls of beeswax at your local craft store.  They also come in candle-making kits that couldn't be simpler.  Place your wick on one side of the wax sheet, roll it up, and Bob's your uncle.  It's lovely and takes only a few minutes.

In the same spirit as the roll-your-own-beeswax candle, I have created a terribly easy candle recipe that would make any star of the most recent episode of "Hoarders" stand and applaud vigorously. ;)

INGREDIENTS:
* Something for a wick (natural fiber string, rope, kitchen string, or buy yourself some commercial wick from the craft store.)
* One bag of your favorite wax-covered Laughing Cow cheese. (Bonbel and Babybel Light use red wax, and their Cheddar variety is coated in yellow wax.)

These candles are romantic and decadent,
not at all cheesy! Available in classic Babybel, or Cheddar.
Step 1.  Eat the cheese as you normally would, storing up all of the awesome wax!  Resist the urge to play with the wax... it's hard, but you need to restrain yourself.  Pick the wax apart so that it's in half-circles or anything flat.

Step 2.  [If you're very anal about germs: wash the wax in cold, slightly soapy water. Soak for a bit, rinse, then allow to air dry undisturbed over the course of a few days.  If you don't care about getting cheese particles in your candle -- and trust me, it's not all that much anyway -- read on...]

Step 3.  Cut your wax into strips and wind it around your wick.  After you've made a nice long, tall strip, wind more wax strips around your first coat.  (It is this step where you can rub a bit of scented oil over your wax strips if you like -- I did roses on mine, and now they smell like roses dipped in cheese.)

Step 4.  Repeat until all of your wax is gone, or your candle is sized and shaped the way you want it.

Step 5.  Put in a candleholder (or a glass filled with pretty stones, as shown) and light, enjoying the dark romantic ambience of your super-easy craft!


Friday, August 5, 2011

Swiffer Stuffs

As most people who know me are well aware, I love to make things.  Cooking is one of my true passions for this very reason: It's quick, most endeavors are relatively inexpensive, and the end result can be used in practical, smart ways that don't end up in a lot of clutter.  You eat it, you poop it out, and Bob's your uncle -- creativity recycled!  

I don't like projects that take forever, or that clutter up the house.  As a serious fan of the Swiffer from when it first came out (and yes, I still have the 1999 Swiffer, which is more sturdy than my 2006 version), I've always considered the replacement covers something of a luxury... if I am dusting, I'm not above twisting them over so that the dust-free side can get its share of use as well. ;)  I've also used things like socks and washcloths for covers when wiping floors that need a bit of wet attention -- and for the most part, these have been successful undertakings.
But I've also wanted to try making a cover that was specifically designed JUST for the Swiffer.  And even though I'm capable of knitting only a simple garter stitch, knitting reusable Swiffer covers out of yarn is just about the easiest thing anyone can do.  Here's how! :)

1.  Choose your medium.  You can see from this picture that I used two different kinds of standard acryllic yarn -- the pretty lavender kind was the last of a soft skein of nicer stuff from JoAnn fabrics, and the burgundy was from a 99-cent store in NYC.  Just use whatever you have; after all, it's not a beauty contest if it's just going to be scrubbing the scum around your toilet.

2.  Knit!  Cast on about 33 rows.  (I used this number because it was my age when these pictures were taken... yeah, these sat around awhile!)  Knit a plain ol' garter stitch until you have a rectangle that pretty much covers your Swiffer.  Your mileage may vary, depending on how tightly you make your stitches and on what size needle you like (I used a size 10), but mine are generally somewhere within the neighborhood of 50 and 70 rows.  It is OK if you knit it to be just a tiny bit too small... keeps the cover on even better, in fact.

3.  Take your rectangle, and fold it into thirds.  The Swiffer will fit into the opening between the thirds.

 4.  Stitch the sides together.  Use anything you want -- more yarn, thread, whatever.  (I used a hideous baby-weight rainbow yarn that I have noooooo idea what other uses I can find for it!)  You could probably even glue or staple them, but that seems like a hell of a lot of trouble, and would likely require many goings-over.

5.  Put the business end of your Swiffer into the horizontal opening.  You can punch the cover down into those annoying little tabs if you want, but honestly I never do, and my Swiffer covers never go anywhere.

6.  If you're dusting, flip it over!  If you're washing something hard-core, flip it over! (Unless the dirty item in question is way too nasty to handle.)
7.  Mine are machine-washable (depends on the yarn you use) and durable.  See the lavender ones in this picture?  They were made about 2 years ago, and are just beginning to get old.

You can also use these without the Swiffer, but it's not quite as much fun.

Friday, January 28, 2011

Clean-Up Time

Fuzz and I don't typically make New Years' resolutions, per se, but since 2010 has brought so many changes to both of our lives, we've decided to stay on trend and continue making more changes  -- positive ones.  In the past few months, I have acquired a trash bag filled with undesireable objects for which I have no use -- a bunch of worn-out clothes, CDs of lame music, a coffee maker that was sitting inside a dirty mold-filled house -- and I've been meaning to get rid of these things for some time now.  I've also been in the process of purging other areas in the house to prepare for a major transition, so it seemed like a great idea to resolve to get rid of our extra shit.

Rather than do a full-on insane sweep of the house, I opted for an easier idea: We'll get rid of a few boxes each month, either until the end of the year or until our house is clean, whatever comes first.  Moving a heap of boxes is a hassle, though.  We've got a longstanding relationship with a number of non-profit organizations to whom we like to give extra money and items whenever we can.  Because our favorite donation organization, the Massachusetts Vietnam Veterans of America, doesn't do door-to-door pickup in our "new" local area, we opted for our other favorite charity, the Big Brother & Big Sister Foundation.  It turned out to be a fabulously successful undertaking... all we needed to do was fill out the form online, have our boxes on the porch for them on the day of the pickup, and Bob's your uncle -- the stuff's out of our lives, and ready to go into the lives of someone who wants them.  Best of all, it helps a wonderful organization to do great things!  Since the January pickup went over so well, I'm already thinking of what I want to donate next month.  I may just decide to tackle the ever-so-nasty Bedroom Closet O' Doom!

Here are a few tips to help you get started donating...

1.  The general rule of thumb is that if you haven't used an item within the past year, and you're not sure you'll be using it within the next year, get rid of it!

2.  Start small.  There's no need to purge every square inch of your living space right away; do it in small, manageable steps.  For example, choose a room -- or part of a room, such as getting all the drawers in one dresser -- and get that done first before moving onto another section of your space.

3.  As FlyLady says, "Never take out more than you can put back in one hour."  I know it's exciting to get things purged, but take your time and do it right.

4.  Schedule your pick-up or drop-off day well in advance so that you can work on the mess in small, manageable bits.  Even if your house looks like an episode of Hoarders exploded all over it, an emergency cleaning session is just gonna stress you out.  Take it slow and make the process as easy and stress-free as possible.  You did not accumulate the clutter in the space of one day, so you need not feel pressured to get it immaculate in one day, either.

5.  Don't let guilt or regrets weigh you down.  Just because you got something for free and/or got a good deal on it (or, worse yet, spent WAY too much on it) doesn't make you obligated to keep it.  Likewise with presents that just aren't "you."  If you don't love it, let it go -- maybe there's someone out there who needs and wants it.  Give those things a good home where they'll be appreciated and loved.

6.  Donate and recycle as much as you can.  It's good for the environment, the economy, and the soul. 

7.  Don't feel the need to put it off because you "haven't gotten it all done yet."  Do what you can, you can always schedule another pick-up, or find local thrift shops and make dropping things off a regular habit!


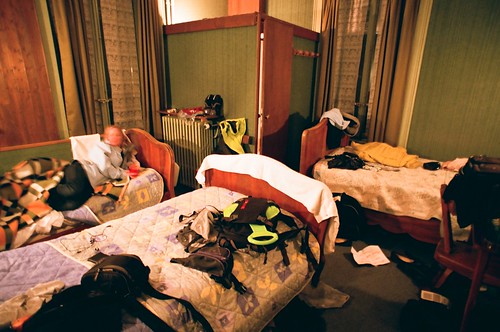
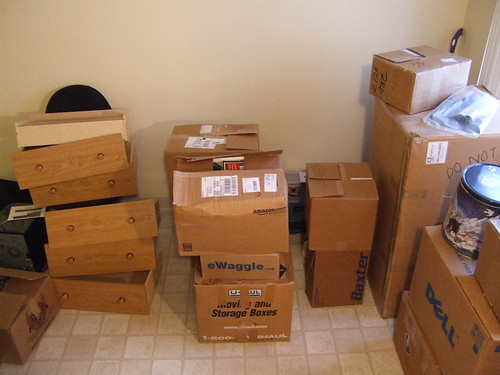
...And, in the interest of recycling and reusing, I have found these lovely pics on Flickr.  Thanks to the talented ed.ward for his awesome "messy room" photo, and the whimsical joebeone for the "moving boxes" pic!  I'm thrilled to give them credit in accordance with Creative Commons.  I do try to take my own pics when I can remember to do so, but I appreciate the sharing spirit of my fellow Flickr users.  Thanks!

Sunday, April 5, 2009

No-Sew Sachet for Lazy People


If you’re like me, you absolutely hate to throw anything away.


I believe that clutter can really bring down a person’s positive energy, so I try very hard to work through my packrat tendencies. I have been in a decluttering phase that’s lasted… oh, about half of my life now! I figure that if I absolutely must hang onto certain things, I’d better make sure that they can serve a functional purpose. Hence, my mission to reincarnate old things into new, awesome, functional stuff! Unlike a lot of crafty folks who seem to have infinite patience and dexterity, I’m more interested in instant gratification. In my opinion, the best projects (a) produce objects that are functional, rather than frivolous, (b) can be completed in the space of one afternoon, or even a few minutes, and (a) won’t clutter up my house too much during its creation, or after it’s finished and ready to enjoy!


It is with this spirit in mind that I share my very humble instructions for a sachet that requires no sewing.

Easiest Sachet Ever:

INGREDIENTS:

1 pretty, but mateless, sock
1-2 handfuls of scented stuff – try potpourri, pieces of leftover scented candles, or extra fabric scraps treated with your favorite essential oil
string, yarn, thread, or ribbon (even rubber bands, in a pinch!) — or just use leftover sock pieces


Trim the cuff and everything below the heel off of your sock. This sachet can be made with the heel/toe section, but I like to work with the ankle. Tie off one end with your string/ribbon/etc., and add the scented stuff (I used a handful of leftover junk from my old Frebreze Scentstories discs!). Tie off the top, trimming your sock ends as needed.

Sachets are wonderful for adding a nice little burst of scent to closets and drawers. You don’t need to spend piles of money on fancy little trimmings, but do make sure that you choose a scent that you love and that has some staying power. The simple construction of this type of sachet will enable you to change the scent when it becomes necessary.

I usually keep the leftover cuffs to use as hair elastics, because even those “ouchless” elastics are sometimes murder on my extremely delicate hair. Leftover cuffs are perfect because they’re gentle, and ready-made in colors to match most of my wardrobe. And hey, free hair accessory… one that I don’t worry about losing or breaking!

A word of caution here: DON'T make the same mistake I did, and use a "fuzzy" sock (pictured). If you do, as I have, you will need put in a few stitches to contain any stray sock fuzz. Or you can fold over the ends of the sock to create a finished hem before adding the rubber bands/elastics. These socks were a hostess gift from a lovely relative who stayed with us last fall. I fell in love with those adorable little crocheted flowers, and when the elastic began wearing out, I knew that I’d have to give them a new life!


Related Posts Plugin for WordPress, Blogger...